Looking for some sweet finishes to your dinner? This collection of 50 dinner dessert ideas has got you covered. Whether you’re in the mood for something light and fruity or rich and chocolatey, you’ll find treats that will satisfy any craving and impress your guests. Grab your apron and let’s whip up some deliciousness!
Sticky Toffee Pudding with Caramel Sauce
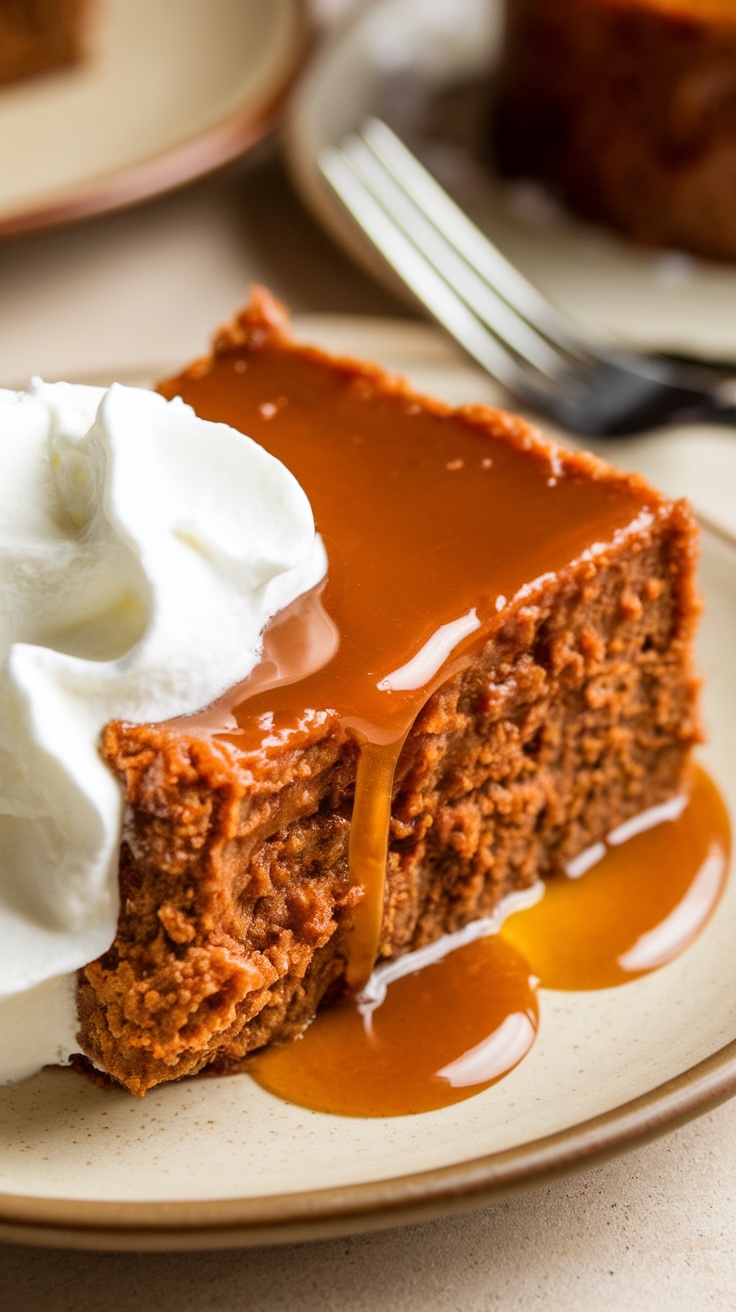
Sticky Toffee Pudding is a delightful British dessert that combines rich, moist cake with a warm, luscious caramel sauce. Its sweetness and texture create a comforting treat, perfect for any occasion. This decadent dessert is simple to make, making it a great choice for both novice and experienced bakers alike.
With its sticky consistency and hints of dates, this pudding pairs beautifully with a dollop of whipped cream or a scoop of vanilla ice cream. Each bite melts in your mouth, offering a warm and inviting flavor that’s hard to resist. It’s a classic dish that will surely impress your family and friends!
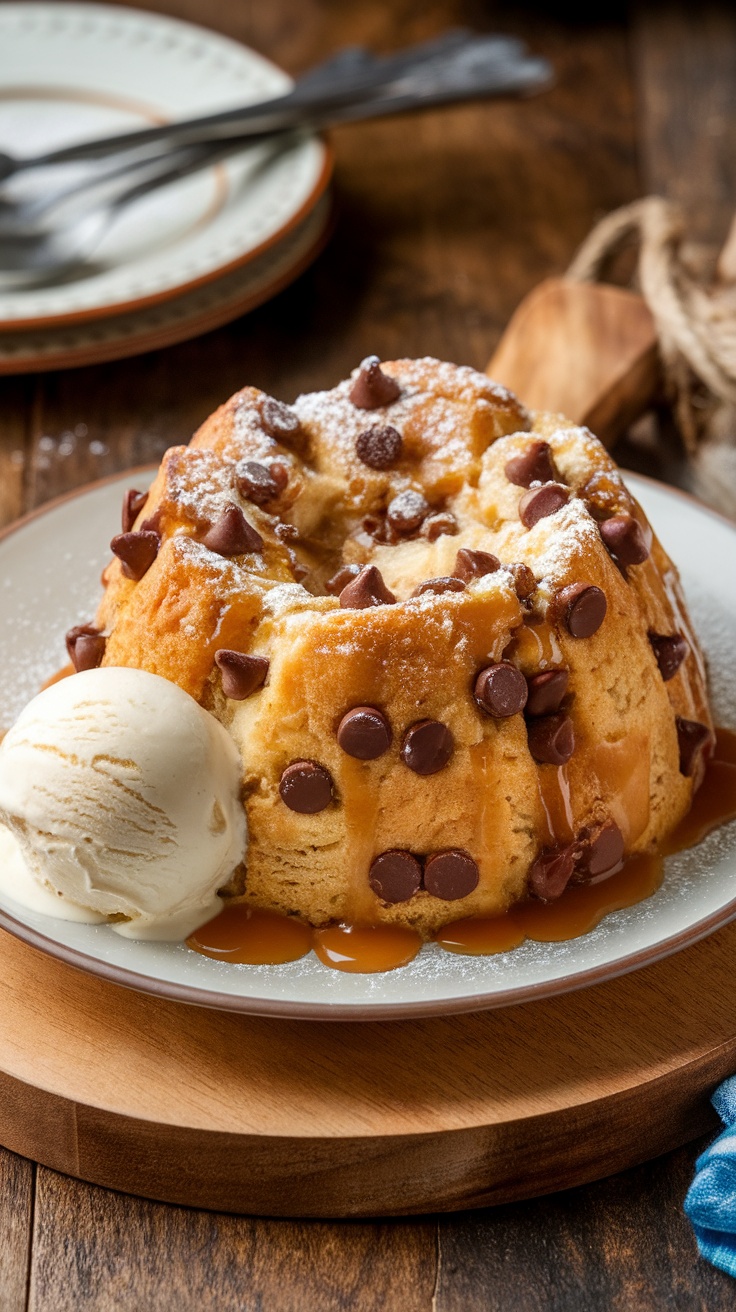
Chocolate Chip Cookie Skillet Dessert
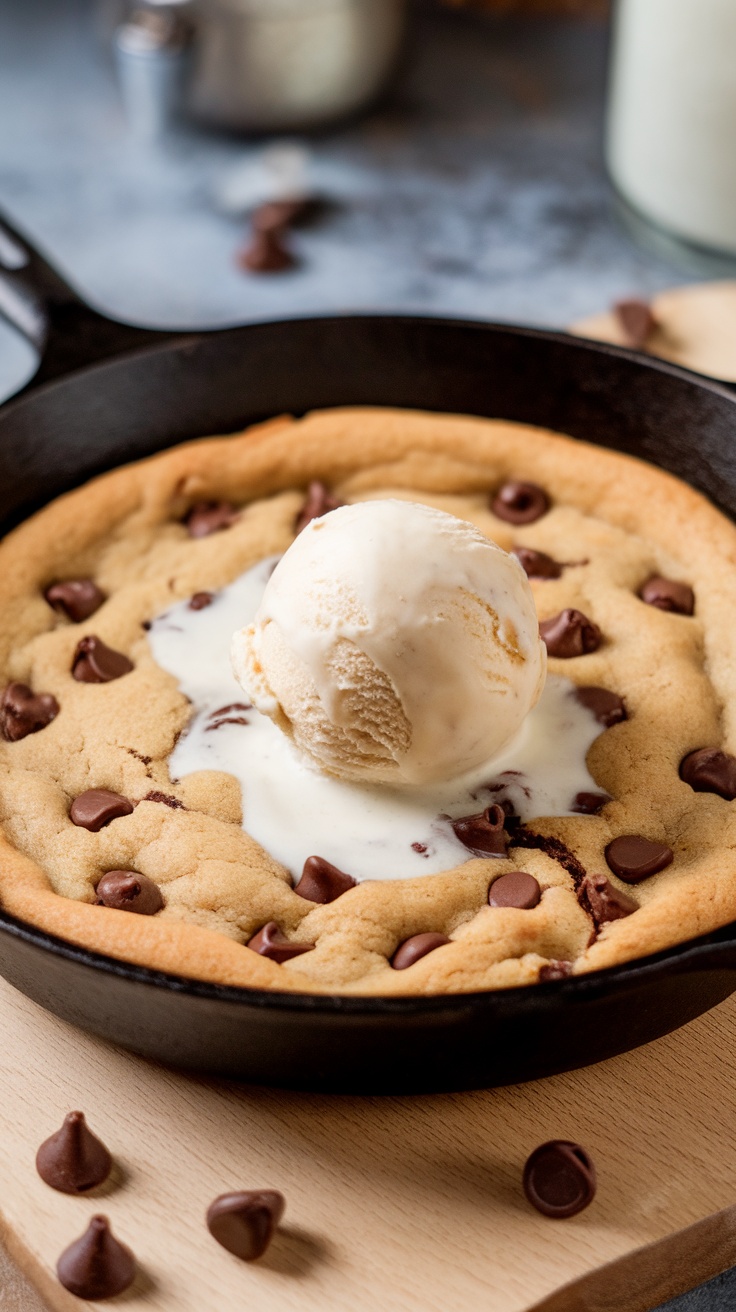
Craving a warm and gooey dessert? This chocolate chip cookie skillet dessert is the perfect treat! Soft and chewy, it’s a delightful combination of flavors that will satisfy any sweet tooth. Plus, it’s incredibly simple to whip up, making it a go-to recipe for last-minute gatherings or cozy nights in.
Imagine biting into a freshly baked chocolate chip cookie, warm from the oven, with melted chocolate chips oozing into every bite. Topped with a scoop of vanilla ice cream, this dessert takes comfort food to a whole new level. Everyone will love sharing this treat straight from the skillet!
Ingredients
- 1 cup unsalted butter, softened
- 1 cup brown sugar, packed
- 1/2 cup granulated sugar
- 2 large eggs
- 2 teaspoons vanilla extract
- 3 cups all-purpose flour
- 1 teaspoon baking soda
- 1/2 teaspoon salt
- 2 cups semi-sweet chocolate chips
Instructions
- Preheat your oven to 350°F (175°C). In a large bowl, cream together the softened butter, brown sugar, and granulated sugar until smooth.
- Add in the eggs one at a time, mixing well after each addition. Stir in the vanilla extract.
- In another bowl, whisk together the flour, baking soda, and salt. Gradually add this dry mixture to the wet ingredients until just combined.
- Fold in the chocolate chips, ensuring they’re evenly distributed throughout the dough.
- Spread the cookie dough evenly in a cast-iron skillet. Bake in the preheated oven for 25-30 minutes or until the edges are golden brown and the center is set.
- Allow to cool slightly before serving. Top with a scoop of vanilla ice cream for that extra touch!
Tiramisu Layers with Coffee Dusting
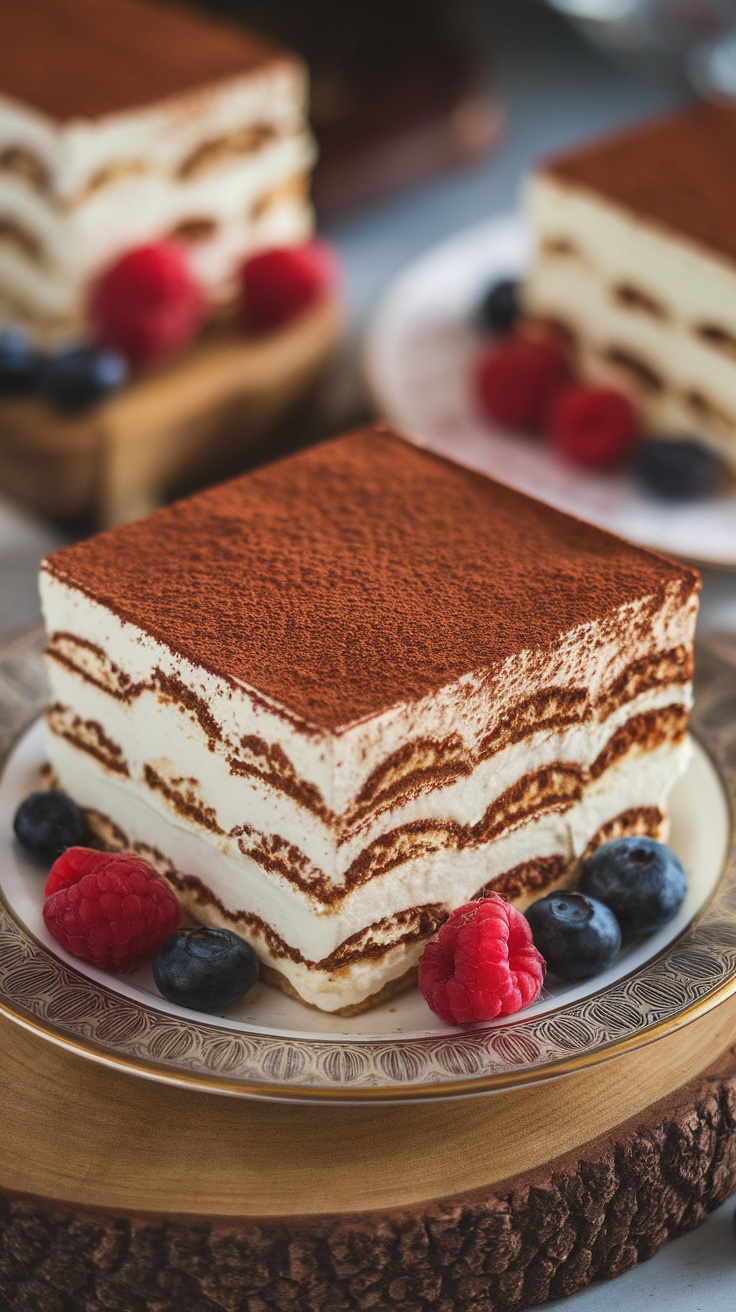
Tiramisu is a classic Italian dessert that brings together layers of coffee-soaked ladyfingers and a rich mascarpone cream. Its delightful blend of flavors offers a perfect balance of sweetness and a slight bitterness from the coffee. This dessert is not only delicious but also surprisingly easy to make, making it a great choice for any dinner gathering.
The creamy texture and the light dusting of cocoa powder on top add a lovely finish to each slice. It’s a crowd-pleaser that can be prepared ahead of time, allowing you to enjoy your evening without the stress of last-minute preparations. Perfect for coffee lovers, Tiramisu is sure to impress!
Ingredients
- 1 cup strong brewed coffee, cooled
- 3 large egg yolks
- 1/2 cup granulated sugar
- 2/3 cup mascarpone cheese
- 1 cup heavy cream
- 1 teaspoon vanilla extract
- 12-15 ladyfingers
- Cocoa powder, for dusting
Instructions
- Prepare the Coffee: Brew a strong cup of coffee and let it cool to room temperature.
- Make the Cream: In a bowl, whisk together the egg yolks and sugar until pale and creamy. Add the mascarpone cheese and vanilla extract, mixing until smooth.
- Whip the Cream: In another bowl, whip the heavy cream until soft peaks form. Gently fold the whipped cream into the mascarpone mixture until combined.
- Assemble the Tiramisu: Dip each ladyfinger briefly into the coffee and layer them in a dish. Spread half of the mascarpone mixture on top. Repeat with another layer of dipped ladyfingers and the remaining mascarpone cream.
- Chill: Cover and refrigerate for at least 4 hours, preferably overnight, to allow the flavors to meld.
- Serve: Before serving, dust the top generously with cocoa powder. Slice and enjoy!
Lemon Meringue Pie with Golden Peaks
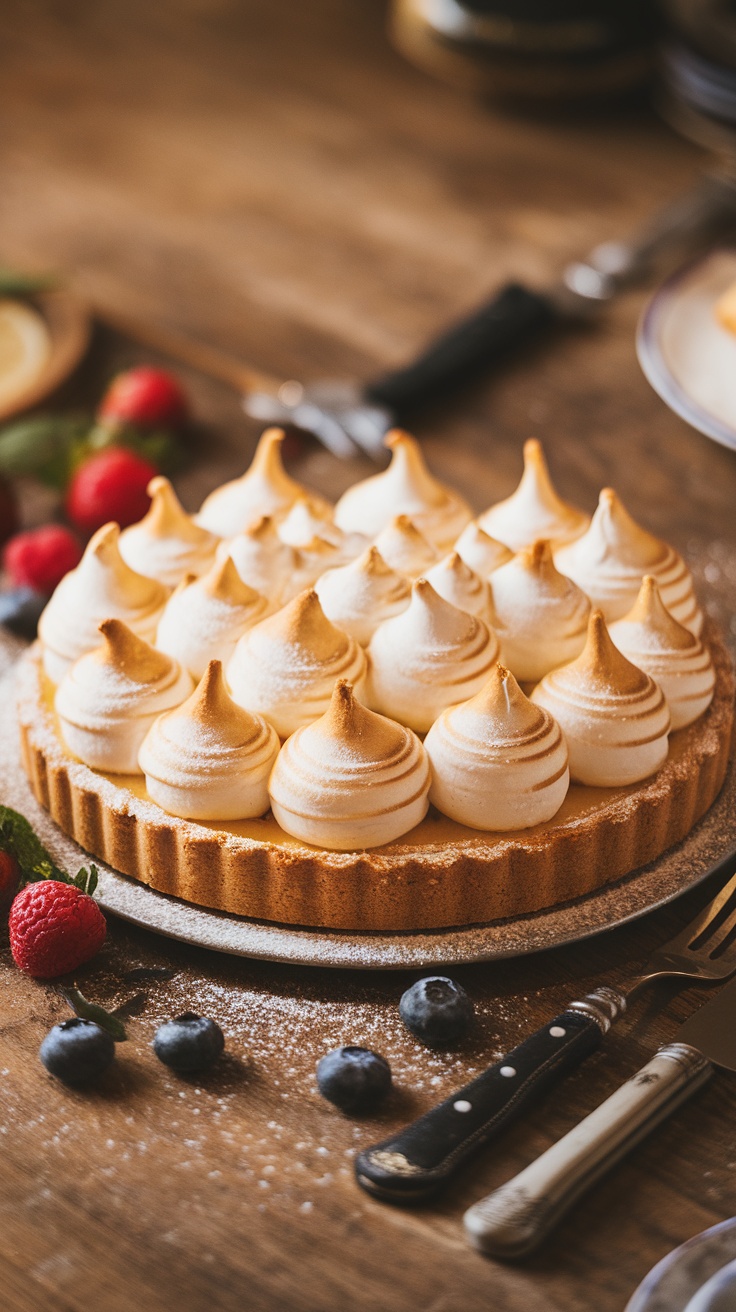
Lemon Meringue Pie is a delightful dessert that perfectly balances tangy lemon curd and fluffy meringue. It’s a sweet treat with a zesty kick, making it a favorite for those who enjoy citrus flavors. The golden peaks of meringue add a beautiful touch, making this pie as pleasing to the eye as it is to the palate.
This recipe is relatively simple to follow, perfect for both novice and experienced bakers. With a buttery crust, a smooth lemon filling, and a fluffy meringue topping, it’s a show-stopper for any dinner gathering.
Ingredients
- 1 pre-made pie crust
- 1 cup granulated sugar
- 1/4 cup cornstarch
- 1/4 teaspoon salt
- 1 1/2 cups water
- 1/2 cup freshly squeezed lemon juice
- 3 large egg yolks
- 2 tablespoons unsalted butter
- 1 teaspoon grated lemon zest
- 3 large egg whites
- 1/4 teaspoon cream of tartar
- 1/2 cup additional granulated sugar
Instructions
- Preheat your oven to 350°F (175°C). Place the pie crust in a pie dish and bake according to package instructions until golden brown. Let it cool.
- In a medium saucepan, whisk together sugar, cornstarch, and salt. Gradually stir in water and bring to a boil over medium heat. Cook until thickened, stirring constantly.
- Remove from heat. Stir in lemon juice, egg yolks, butter, and lemon zest until smooth. Pour the lemon filling into the cooled pie crust.
- For the meringue, beat egg whites and cream of tartar in a clean bowl until soft peaks form. Gradually add sugar, beating until stiff peaks form.
- Spread the meringue over the lemon filling, ensuring it touches the crust to prevent shrinking. Use a spatula to create peaks.
- Bake for 10-15 minutes until the meringue is golden. Allow the pie to cool at room temperature before slicing.
Chocolate Lava Cake with Vanilla Ice Cream
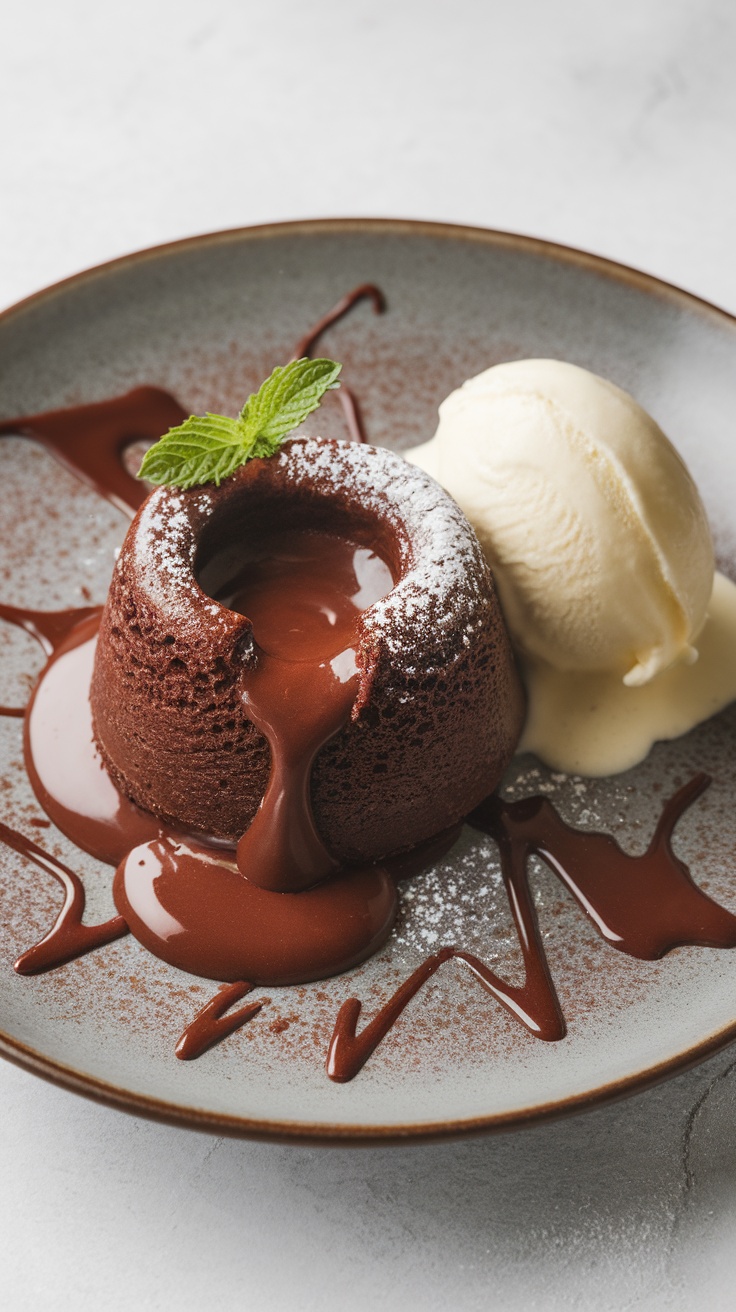
Chocolate lava cake is a delightful dessert that combines a rich, molten chocolate center with a soft cake exterior. This treat is perfect for chocolate lovers, offering a warm and gooey experience that is sure to impress. It’s surprisingly easy to make, so it’s a great option for both special occasions and casual dinners.
Pairing the warm chocolate cake with a scoop of vanilla ice cream creates a fantastic contrast in temperatures and flavors. The creamy ice cream complements the intense chocolate, making each bite a perfect blend of sweetness. It’s a simple yet elegant dessert that will leave everyone wanting more!
Ingredients
- 1/2 cup unsalted butter
- 1 cup semi-sweet chocolate chips
- 2 large eggs
- 2 large egg yolks
- 1/4 cup granulated sugar
- 2 tablespoons all-purpose flour
- 1/2 teaspoon vanilla extract
- Powdered sugar for dusting
- Vanilla ice cream for serving
Instructions
- Preheat your oven to 425°F (220°C) and grease four ramekins with butter and a dusting of flour.
- In a microwave-safe bowl, melt the butter and chocolate chips together, stirring until smooth.
- In a separate bowl, whisk together the eggs, egg yolks, and granulated sugar until fluffy. Add the melted chocolate mixture and stir to combine.
- Fold in the flour and vanilla extract until just combined.
- Pour the batter evenly into the prepared ramekins and place them on a baking sheet.
- Bake for 12-14 minutes, or until the edges are firm but the center remains soft.
- Let the cakes cool for 1 minute, then carefully invert them onto plates. Dust with powdered sugar and serve immediately with a scoop of vanilla ice cream.
Pavlova Nest with Fresh Fruits
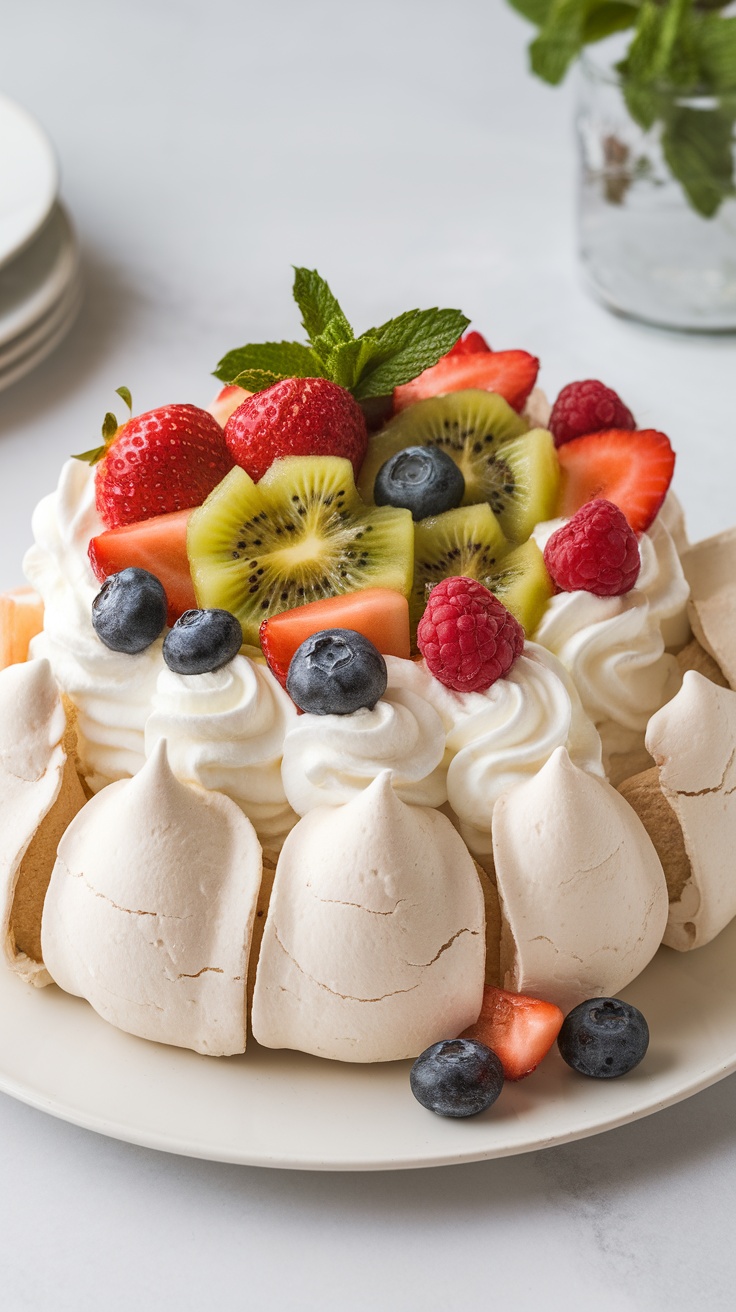
Pavlova is a delightful dessert that features a crisp meringue shell filled with soft whipped cream and topped with fresh fruits. The light, airy texture of the meringue, combined with the creaminess of the topping and the burst of flavor from the fruits, makes this dessert a true crowd-pleaser. It’s simple to prepare and adds a touch of elegance to any dinner party or family gathering.
This recipe not only looks stunning but also allows you to customize with your favorite seasonal fruits, whether it’s berries, kiwi, or even tropical options like mango. The balance of sweetness from the meringue and the tartness from the fruits creates a harmonious flavor profile that everyone will enjoy. Plus, it’s gluten-free, making it a great option for various dietary needs!
Ingredients
- 4 large egg whites
- 1 cup granulated sugar
- 1 teaspoon white vinegar
- 1 teaspoon cornstarch
- 1 cup heavy whipping cream
- 2 tablespoons powdered sugar
- 1 teaspoon vanilla extract
- 2 cups mixed fresh fruits (strawberries, blueberries, kiwi, raspberries)
- Mint leaves for garnish
Instructions
- Preheat your oven to 275°F (135°C). Line a baking sheet with parchment paper and draw a 9-inch circle on the paper.
- In a large bowl, beat the egg whites until soft peaks form. Gradually add the granulated sugar, continuing to beat until the mixture is glossy and stiff peaks form.
- Gently fold in the vinegar and cornstarch.
- Spoon the meringue mixture onto the prepared circle, creating a well in the center to hold the filling.
- Bake for 1 hour, then turn off the oven and let the meringue cool completely inside the oven.
- Once cooled, whip the heavy cream with the powdered sugar and vanilla extract until soft peaks form.
- Fill the cooled meringue nest with whipped cream and top with the mixed fresh fruits. Garnish with mint leaves.
Apple Crisp with Oat Topping
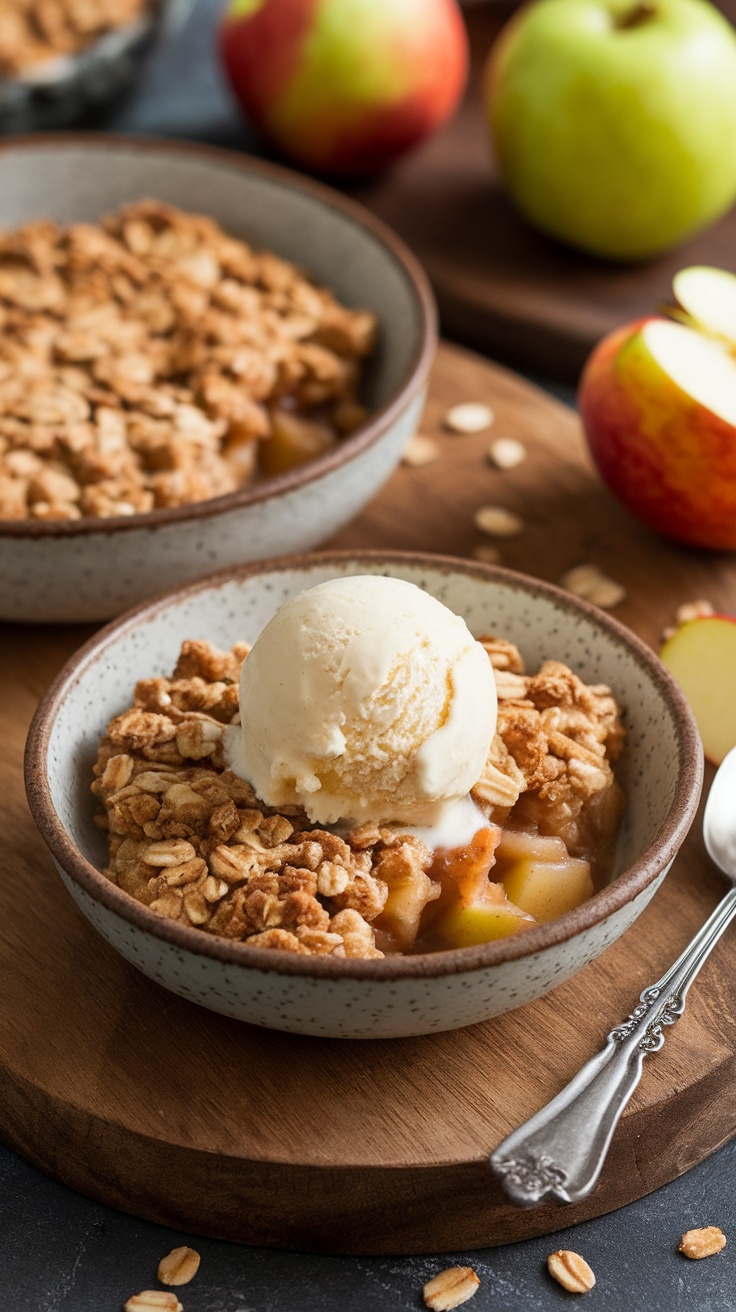
Apple crisp is a delightful dessert that combines tender, spiced apples with a crunchy oat topping. It’s sweet, warm, and comforting, making it perfect for cozy evenings. The blend of cinnamon and nutmeg brings out the natural sweetness of the apples, while the oat topping adds a satisfying crunch.
This recipe is simple to whip up, requiring minimal ingredients and effort. It’s an ideal choice for both novice bakers and seasoned pros. Serve it warm, perhaps with a scoop of vanilla ice cream on top for an extra treat!
Ingredients
- 6 cups peeled and sliced apples (such as Granny Smith or Honeycrisp)
- 1 tablespoon lemon juice
- 1 teaspoon ground cinnamon
- 1/2 cup granulated sugar
- 1/4 cup all-purpose flour
- 1 cup rolled oats
- 1/2 cup brown sugar, packed
- 1/2 cup unsalted butter, melted
- 1/2 teaspoon salt
Instructions
- Preheat your oven to 350°F (175°C).
- In a large bowl, toss the sliced apples with lemon juice, cinnamon, granulated sugar, and flour until well coated. Spread the apple mixture evenly in a greased baking dish.
- In another bowl, combine the oats, brown sugar, melted butter, and salt. Mix until crumbly.
- Sprinkle the oat mixture over the apples, making sure to cover them evenly.
- Bake for 30-35 minutes or until the topping is golden brown and the apples are tender.
- Let it cool slightly before serving. Enjoy your apple crisp warm, ideally with a scoop of ice cream!
Banana Foster with Rum Sauce
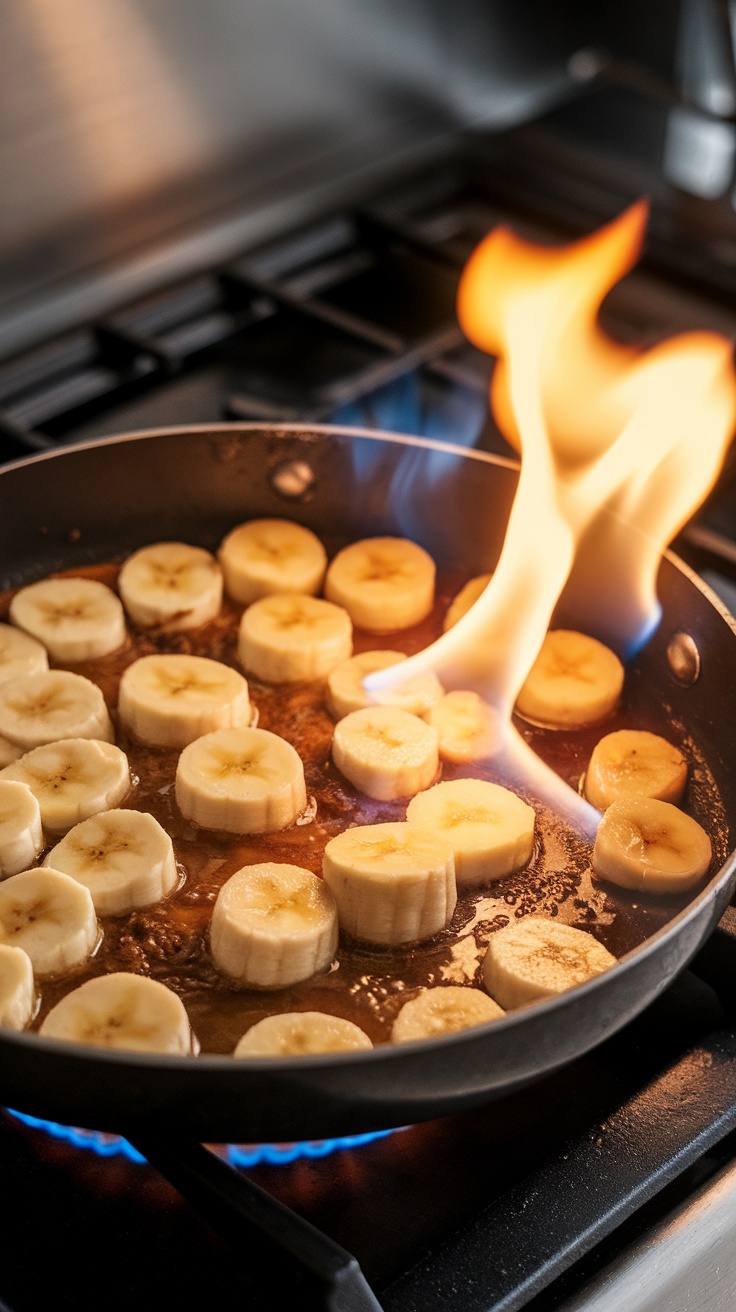
Banana Foster is a delightful dessert that brings together the sweetness of bananas and the warmth of rum in a truly indulgent way. This classic dish is simple to make and perfect for impressing guests or treating yourself after a long day.
The bananas are caramelized in a luscious buttery rum sauce, creating a rich flavor that is hard to resist. Serve it warm over vanilla ice cream for a heavenly combination that will satisfy any sweet tooth!
Ingredients
- 4 ripe bananas, sliced
- 1/2 cup unsalted butter
- 1 cup brown sugar
- 1/4 cup dark rum
- 1 teaspoon vanilla extract
- 1/2 teaspoon cinnamon
- Vanilla ice cream, for serving
Instructions
- In a large skillet, melt the butter over medium heat. Add the brown sugar and stir until the mixture is melted and bubbly.
- Add the sliced bananas to the skillet and cook for about 2-3 minutes until they begin to soften.
- Carefully add the rum and ignite it with a long lighter (or let it cook without flame for a non-flambé version). Allow to cook for another 1-2 minutes until the alcohol burns off and the sauce thickens slightly.
- Stir in the vanilla extract and cinnamon.
- Serve the banana mixture over scoops of vanilla ice cream and enjoy!
Crème Brûlée with Caramelized Sugar
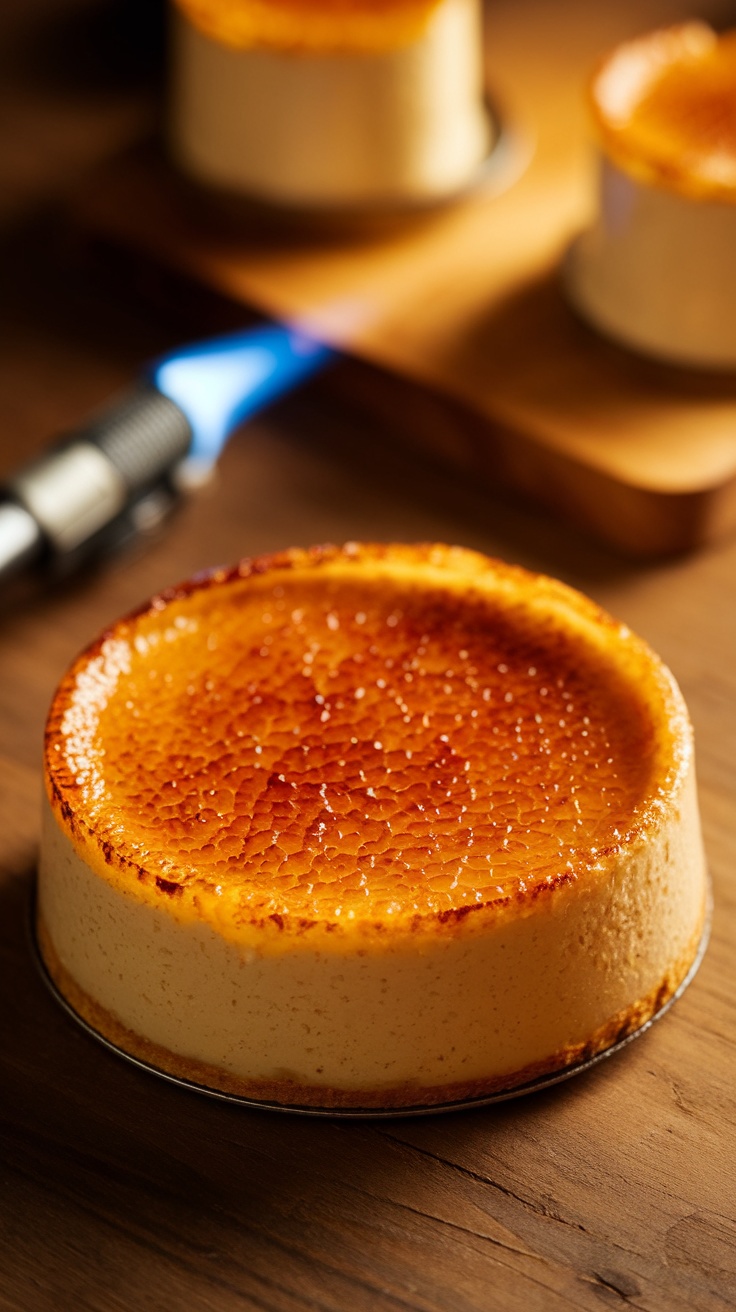
Crème brûlée is a classic dessert that combines a creamy custard base with a layer of caramelized sugar on top. The contrast between the smooth, rich custard and the crispy, burnt sugar creates a delightful experience for your taste buds. This dessert is not only delicious but also a simple and elegant treat that impresses everyone.
Preparing crème brûlée at home is easier than you might think. With just a few ingredients, you can whip up this delectable dessert that feels like a gourmet treat. The key is to achieve that perfectly caramelized sugar crust, which adds a satisfying crunch to every bite. Whether you’re hosting a dinner party or simply indulging in a sweet craving, crème brûlée is sure to be a hit!
Ingredients
- 2 cups heavy cream
- 1 teaspoon vanilla extract
- 1/2 cup granulated sugar
- 4 large egg yolks
- 1/4 cup additional sugar for caramelizing
Instructions
- Preheat the oven to 325°F (160°C).
- In a saucepan, combine the heavy cream and vanilla extract. Heat over medium until just boiling, then remove from heat.
- In a mixing bowl, whisk together the granulated sugar and egg yolks until smooth and slightly pale.
- Gradually pour the hot cream into the egg mixture, whisking constantly to avoid curdling.
- Strain the mixture through a fine sieve to ensure a smooth custard.
- Pour the custard into ramekins and place them in a baking dish. Fill the baking dish with hot water until it reaches halfway up the sides of the ramekins.
- Bake for 30-35 minutes, or until the custard is set but still slightly jiggly in the center. Remove from the oven and let cool. Chill in the refrigerator for at least 2 hours.
- Once chilled, sprinkle a thin layer of sugar over the top of each custard. Use a kitchen torch to caramelize the sugar until golden brown. If you don’t have a torch, you can place the ramekins under a broiler for a few minutes.
- Let the caramelized sugar cool for a moment before serving. Enjoy your homemade crème brûlée!
Matcha Green Tea Tiramisu
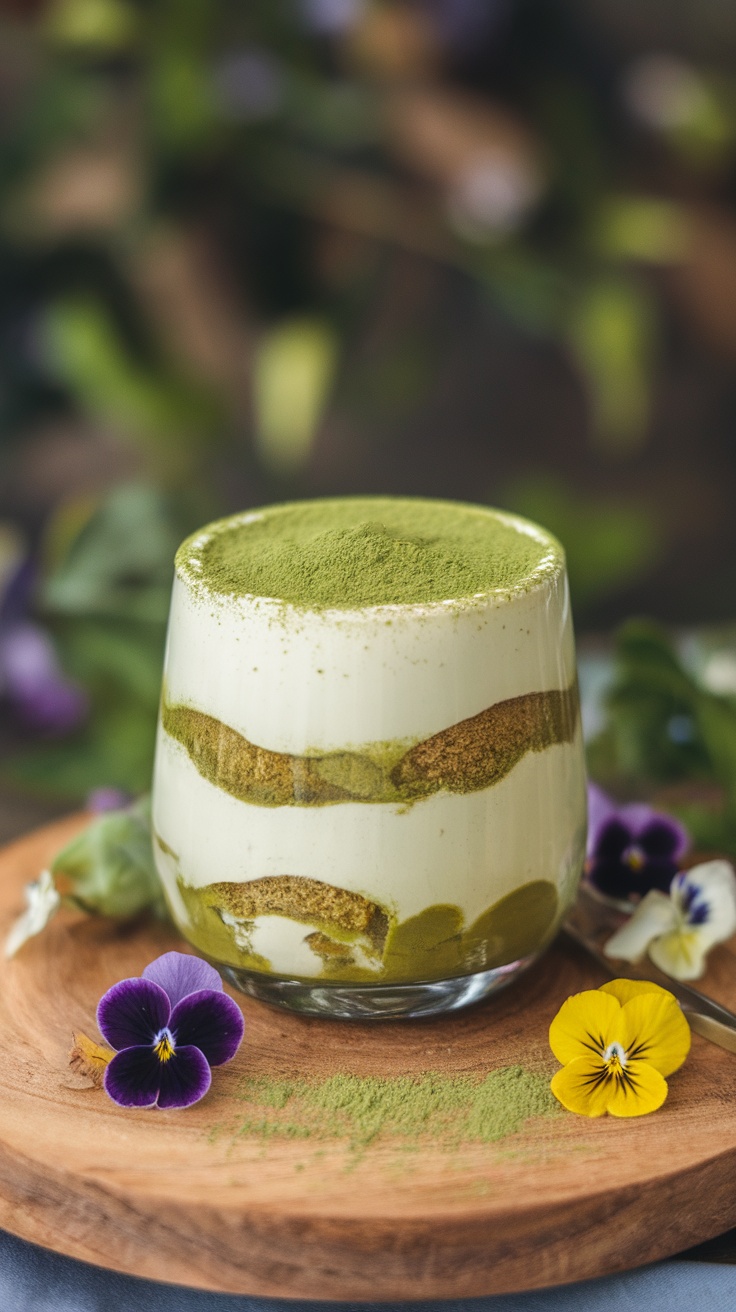
Matcha Green Tea Tiramisu is a delightful twist on the classic Italian dessert. Combining the earthy flavors of matcha with the creamy texture of mascarpone, this dessert is both refreshing and indulgent. It’s perfect for impressing guests or simply treating yourself after dinner.
This recipe is fairly simple to make, requiring just a few ingredients and a bit of time for layering. The result is a visually stunning dessert that offers a unique taste profile, making it a favorite among matcha lovers and dessert enthusiasts alike.
Ingredients
- 1 cup strong brewed matcha tea, cooled
- 1 cup mascarpone cheese
- 1 cup heavy cream
- 1/2 cup granulated sugar
- 1 teaspoon vanilla extract
- 1 package ladyfinger cookies
- Matcha powder for dusting
Instructions
- Prepare the Matcha: Brew a cup of strong matcha tea and let it cool.
- Make the Cream Mixture: In a large bowl, whisk together mascarpone cheese, heavy cream, sugar, and vanilla extract until smooth and creamy.
- Dip the Ladyfingers: Quickly dip each ladyfinger into the cooled matcha tea, being careful not to soak them.
- Layer the Ingredients: In a serving dish, layer the dipped ladyfingers and then add a layer of the mascarpone mixture. Repeat until you run out of ingredients, finishing with a layer of the cream.
- Chill: Cover the dish and refrigerate for at least 4 hours, or overnight for best results.
- Serve: Before serving, dust the top with matcha powder for an elegant finish.
Churros with Chocolate Dipping Sauce

Churros are a delightful treat that combines a crispy exterior with a soft, fluffy inside. When dusted with sugar and served with a rich chocolate dipping sauce, they become an irresistible dessert that elevates any meal. This recipe is simple enough for anyone to try, making it perfect for both novice bakers and seasoned chefs.
The churros are made from a straightforward dough that’s piped into hot oil, frying to golden perfection. The chocolate sauce adds a luxurious touch, creating a sweet and satisfying end to your dinner. This dessert is sure to impress your family or guests without requiring hours in the kitchen.
Classic New York Cheesecake with Berry Compote

Classic New York cheesecake is a creamy and rich dessert that’s perfect for any occasion. With its velvety texture and a buttery graham cracker crust, it strikes a delightful balance between sweet and tangy. Topped with a vibrant berry compote, this cheesecake not only looks stunning but adds a fresh burst of flavor that elevates it to another level.
This recipe is fairly simple to follow, making it a great choice for both novice and experienced bakers. The key is allowing the cheesecake to cool and set, which can be a little patient work, but the result is worth every minute!
Ingredients
- 2 cups graham cracker crumbs
- 1/2 cup unsalted butter, melted
- 1 cup granulated sugar
- 4 (8 ounce) packages cream cheese, softened
- 1 teaspoon vanilla extract
- 4 large eggs
- 1 cup sour cream
- 2 cups mixed berries (strawberries, blueberries, raspberries)
- 1/4 cup powdered sugar
Instructions
- Prepare the Crust: Preheat your oven to 350°F (175°C). In a bowl, mix graham cracker crumbs with melted butter and 1/4 cup of sugar. Press this mixture firmly into the bottom of a 9-inch springform pan.
- Make the Filling: In a large mixing bowl, beat the softened cream cheese until smooth. Gradually add the remaining sugar and vanilla, mixing well. Add eggs one at a time, beating just until combined. Then mix in the sour cream until smooth.
- Bake: Pour the cream cheese mixture into the prepared crust. Bake in the preheated oven for 55-60 minutes or until the edges are set and the center is slightly jiggly. Turn off the oven and leave the cheesecake inside for another hour.
- Cool: Remove the cheesecake from the oven and let it cool at room temperature for about an hour. Then refrigerate for at least 4 hours, preferably overnight.
- Prepare the Berry Compote: In a small saucepan, combine mixed berries and powdered sugar over medium heat. Cook until the berries break down and create a syrup, about 5-10 minutes. Let it cool before serving.
- Serve: Once the cheesecake is chilled, slice and serve with a generous spoonful of berry compote on top. Enjoy!
Raspberry Fool with Whipped Cream
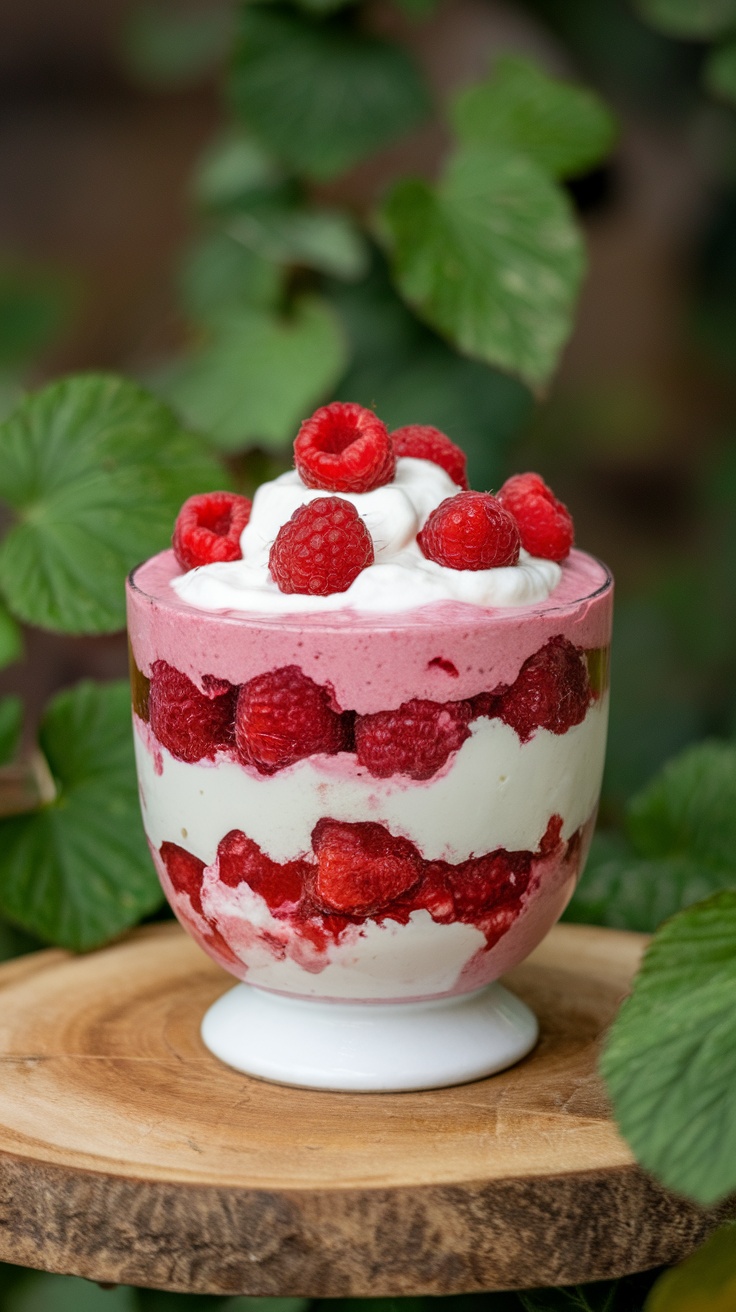
Raspberry fool is a delightful dessert that combines fresh raspberries with whipped cream for a light and creamy treat. The sweet-tart flavor of the raspberries pairs perfectly with the fluffy whipped cream, creating a texture that’s both smooth and refreshing. It’s an easy recipe to whip up, making it perfect for both dinner parties and casual family meals.
The beauty of this dessert lies in its simplicity. With just a few ingredients, you can create a stunning dish that looks as good as it tastes. The bright color and fruity flavor will surely impress your guests, and it’s a great way to showcase seasonal berries. Plus, it can be made in advance, allowing you to enjoy your evening without the stress of last-minute preparation.
Ingredients
- 2 cups fresh raspberries
- 1/4 cup granulated sugar
- 1 cup heavy cream
- 1 teaspoon vanilla extract
- Mint leaves for garnish (optional)
Instructions
- Prepare the Raspberries: In a medium bowl, gently mash the raspberries with the sugar until they release their juices. Set aside for about 10 minutes to allow the flavors to meld.
- Whip the Cream: In a separate bowl, beat the heavy cream and vanilla extract until soft peaks form. Be careful not to overwhip; you want it fluffy and smooth.
- Combine: Gently fold the mashed raspberries into the whipped cream, creating a marbled effect. You can mix thoroughly if you prefer a more uniform color.
- Serve: Spoon the raspberry fool into individual serving glasses or bowls. Top with extra raspberries and mint leaves if desired.
- Chill: For the best flavor, let it chill in the refrigerator for about 30 minutes before serving.
Peanut Butter Pie with Chocolate Drizzle
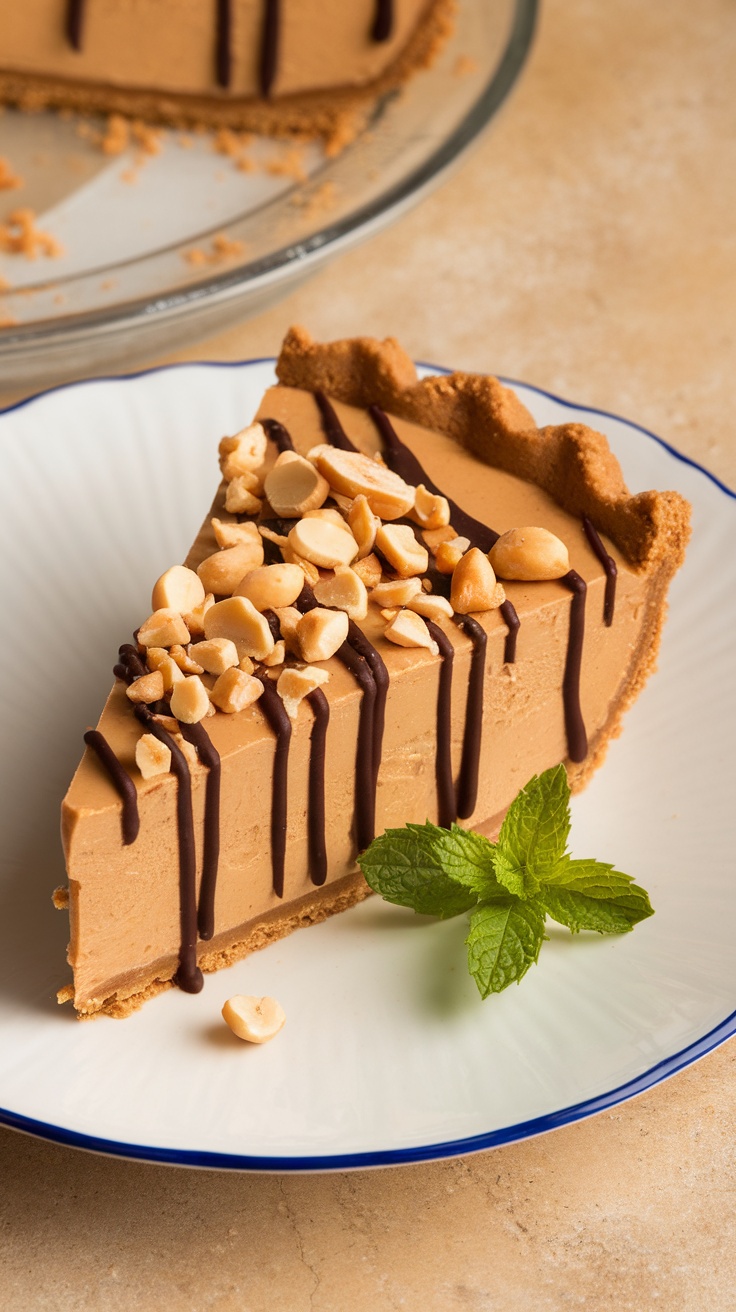
Peanut Butter Pie with Chocolate Drizzle is a delightful dessert that combines the creamy richness of peanut butter with a smooth chocolate finish. It’s a crowd-pleaser with its sweet and slightly salty flavor, making it perfect for any occasion. Plus, this pie is simple to whip up, requiring no baking, which makes it a great choice for those who want a quick yet impressive dessert.
This pie starts with a buttery graham cracker crust that perfectly complements the creamy peanut butter filling. Topped with a glossy chocolate drizzle and a sprinkle of chopped peanuts, it looks as good as it tastes! You’ll love how easy it is to prepare and how it brings smiles to everyone’s faces.
Ingredients
- 1 ½ cups graham cracker crumbs
- ½ cup unsalted butter, melted
- 1 cup creamy peanut butter
- 1 cup powdered sugar
- 8 oz cream cheese, softened
- 1 tsp vanilla extract
- 1 cup heavy cream
- ½ cup semisweet chocolate chips
- 2 tbsp milk
- ¼ cup chopped peanuts (for garnish)
Instructions
- Prepare the Crust: In a bowl, combine graham cracker crumbs and melted butter. Press the mixture firmly into the bottom of a pie pan to form the crust. Chill in the refrigerator for about 15 minutes.
- Make the Filling: In a mixing bowl, beat together peanut butter, powdered sugar, cream cheese, and vanilla until smooth. In another bowl, whip the heavy cream until stiff peaks form, then gently fold it into the peanut butter mixture.
- Fill the Crust: Pour the peanut butter filling into the chilled graham cracker crust, spreading it evenly. Refrigerate for at least 4 hours or until set.
- Prepare the Chocolate Drizzle: In a small saucepan, melt chocolate chips with milk over low heat until smooth. Stir continuously to prevent burning.
- Drizzle and Serve: Once the pie is set, remove it from the refrigerator. Drizzle the melted chocolate over the top, then sprinkle with chopped peanuts. Slice and enjoy!
Pineapple Upside-Down Cake
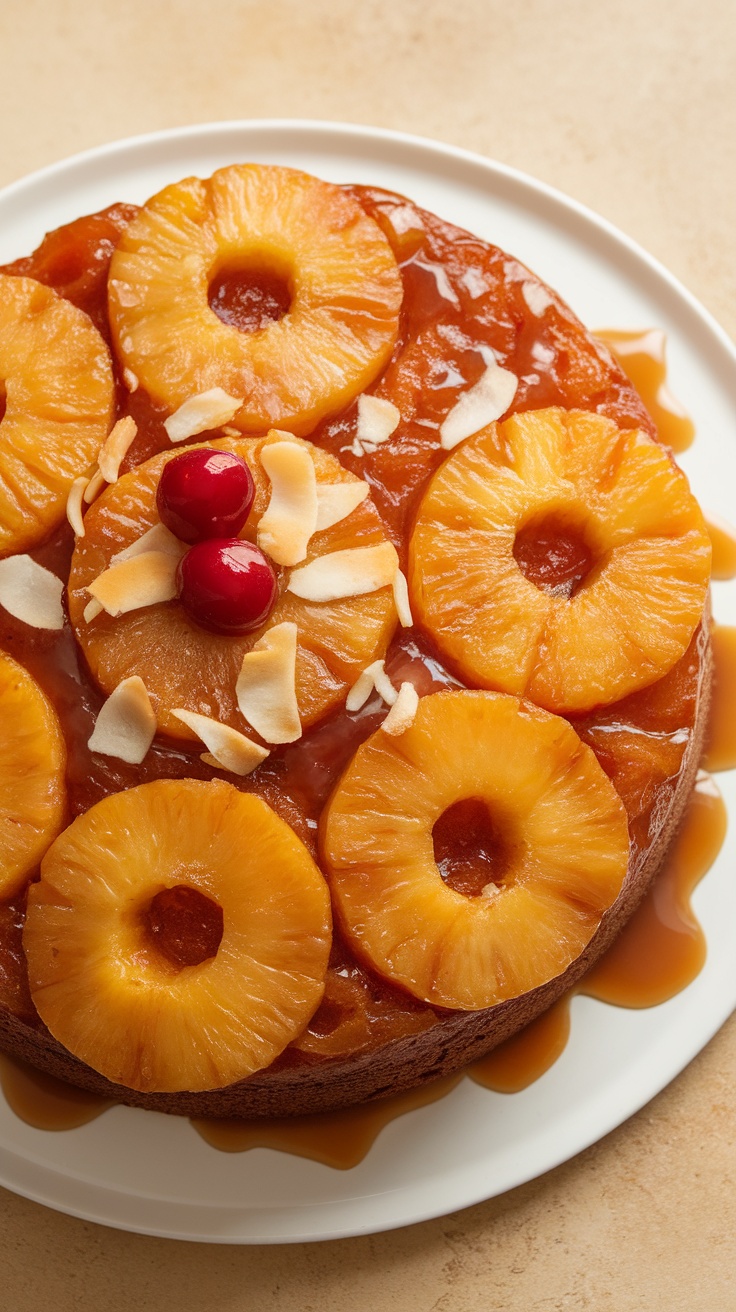
Pineapple Upside-Down Cake is a delightful twist on traditional desserts, combining a moist cake with a sweet, caramelized topping of pineapple rings and cherries. Each slice offers a burst of tropical flavor that’s both refreshing and satisfying. This cake is incredibly simple to make, perfect for those who want to treat themselves or impress guests without spending hours in the kitchen.
The cake is beautifully moist, thanks to the juicy pineapples and buttery topping, making it a beloved choice for any occasion. Whether served at a family gathering or as a comforting weeknight dessert, this classic recipe never disappoints. Let’s jump into the ingredients and steps to create this delicious treat!
Ingredients
- 1/4 cup unsalted butter
- 1/2 cup brown sugar
- 1 can (20 oz) sliced pineapple, drained
- Maraschino cherries, for decoration
- 1 cup all-purpose flour
- 1 teaspoon baking powder
- 1/4 teaspoon salt
- 1/2 cup granulated sugar
- 1/2 cup milk
- 1 large egg
- 1 teaspoon vanilla extract
Instructions
- Prepare the Pan: Preheat your oven to 350°F (175°C). Melt the butter in a 9-inch round cake pan, then add brown sugar, mixing until combined.
- Arrange Pineapple: Place the drained pineapple slices over the butter and sugar mixture. Put a cherry in the center of each pineapple ring.
- Make the Batter: In a bowl, mix flour, baking powder, and salt. In another bowl, combine granulated sugar, milk, egg, and vanilla extract. Gradually add the dry ingredients to the wet mixture, stirring until just combined.
- Combine and Bake: Pour the batter evenly over the pineapple slices in the pan. Bake for 30-35 minutes or until a toothpick inserted into the center comes out clean.
- Cool and Serve: Allow the cake to cool in the pan for about 10 minutes. Carefully invert onto a serving plate to reveal the beautiful pineapple topping. Serve warm or at room temperature!
S’mores Dip with Graham Crackers
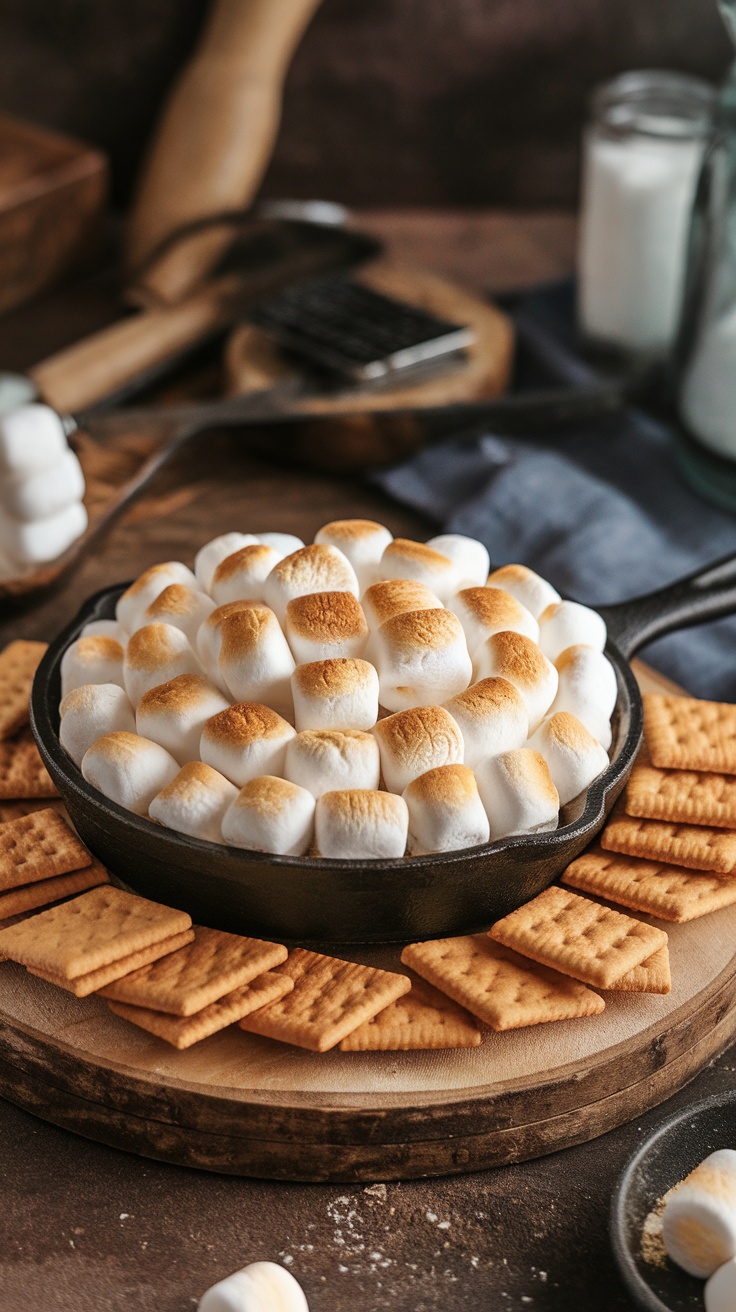
S’mores Dip brings the classic campfire treat indoors, combining gooey melted chocolate and toasted marshmallows into one delightful dish. This easy-to-make dessert is perfect for gatherings or a cozy night in, and it satisfies that sweet tooth with every bite.
With just a few ingredients and minimal prep time, this recipe is an instant crowd-pleaser. The rich chocolate pairs perfectly with the crispy graham crackers, making it a fun and interactive dessert that everyone can enjoy.
Vanilla Panna Cotta with Berry Sauce
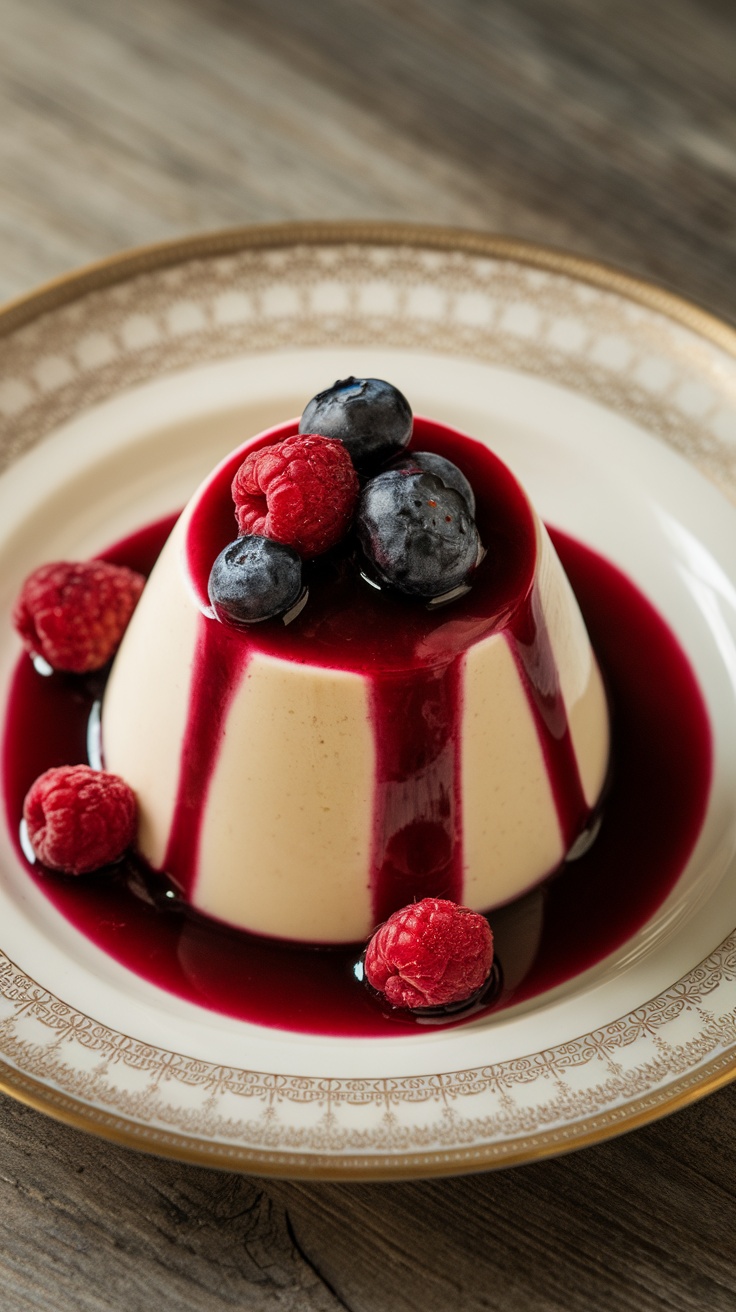
Vanilla panna cotta is a creamy, dreamy dessert that feels luxurious yet is surprisingly easy to make. This classic Italian treat has a rich vanilla flavor and a silky texture that melts in your mouth. It’s perfect for impressing guests or just enjoying a sweet moment to yourself at home.
Topped with a fresh berry sauce, this panna cotta brings a bright, tangy contrast to the smooth vanilla base. The berries add a pop of color and a burst of flavor, making each spoonful delightful. Whether you’re hosting a dinner party or treating yourself, this dessert will surely be a hit!
Ingredients
- 2 cups heavy cream
- 1/2 cup granulated sugar
- 1 teaspoon vanilla extract
- 2 1/2 teaspoons unflavored gelatin
- 3 tablespoons cold water
- 1 cup mixed berries (strawberries, raspberries, blueberries)
- 2 tablespoons lemon juice
- 1 tablespoon honey
Instructions
- Prepare the Gelatin: In a small bowl, sprinkle gelatin over cold water and let it sit for about 5 minutes to bloom.
- Heat the Cream: In a saucepan, combine heavy cream and sugar. Heat over medium heat until just simmering, stirring until the sugar dissolves.
- Add the Gelatin: Remove the saucepan from the heat and stir in the bloomed gelatin and vanilla extract until fully dissolved.
- Chill the Mixture: Pour the mixture into ramekins and refrigerate for at least 4 hours, or until set.
- Make the Berry Sauce: In a small saucepan, combine mixed berries, lemon juice, and honey. Cook over medium heat until the berries break down and the sauce thickens slightly, about 5 minutes. Let it cool.
- Serve: Once the panna cotta is set, run a knife around the edges of the ramekins and invert onto plates. Drizzle berry sauce on top and enjoy!
Coconut Cream Pie with Whipped Topping
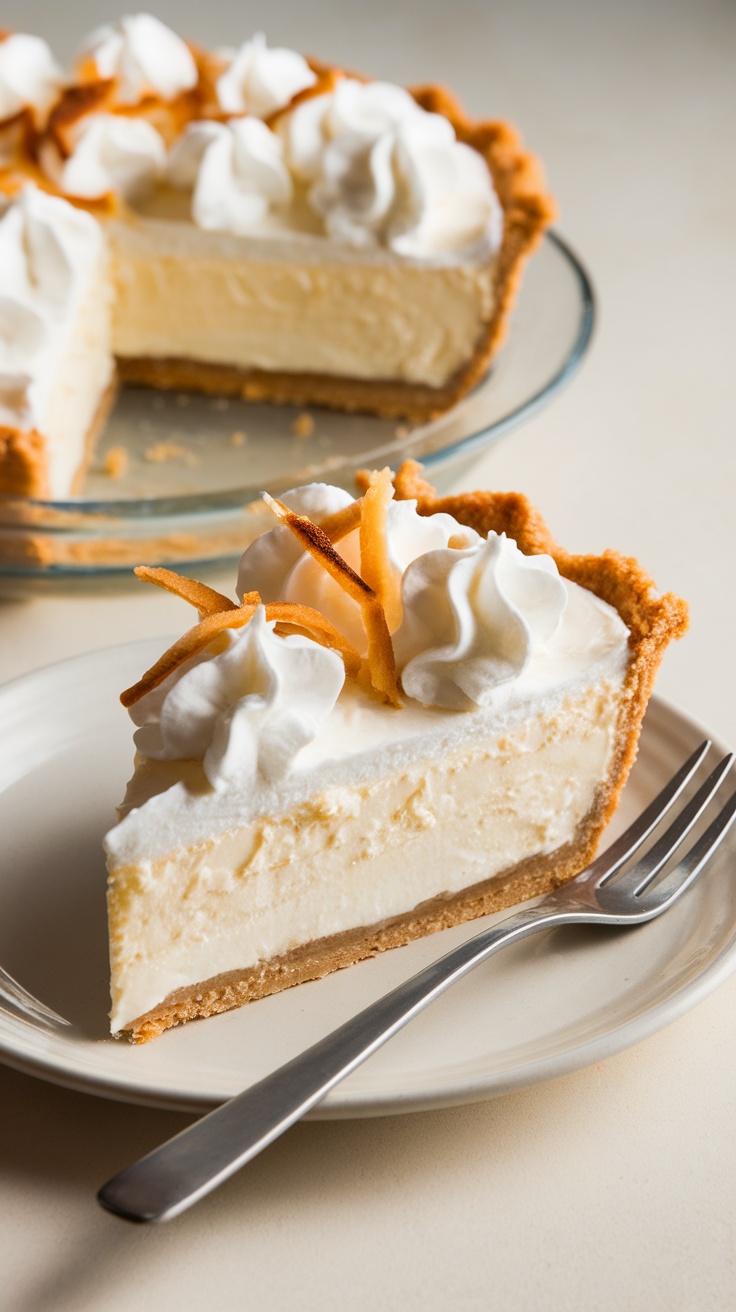
Coconut cream pie is a delightful dessert that combines a rich, creamy filling with the tropical flavor of coconut. This dessert is not only refreshing but also has a wonderful texture that melts in your mouth. It’s easy to make and perfect for serving after dinner, bringing a touch of elegance to any meal.
The pie features a buttery crust filled with a luscious coconut custard, topped with fluffy whipped cream. Each bite is a perfect balance of sweetness and creamy goodness, making it a favorite among coconut lovers. Whether you’re celebrating a special occasion or simply treating yourself, this coconut cream pie will surely impress!
Ingredients
- 1 pre-baked pie crust
- 1 cup sweetened shredded coconut
- 2 cups whole milk
- 3/4 cup granulated sugar
- 1/4 cup cornstarch
- 1/4 teaspoon salt
- 3 large egg yolks
- 2 tablespoons unsalted butter
- 1 teaspoon vanilla extract
- 1 cup heavy cream
- 2 tablespoons powdered sugar
Instructions
- Prepare the Filling: In a saucepan, combine the milk, sugar, cornstarch, and salt. Stir over medium heat until the mixture thickens and starts to bubble.
- Mix in the Egg Yolks: In a separate bowl, whisk the egg yolks. Gradually add a small amount of the hot mixture to the yolks to temper them, then pour the yolk mixture back into the saucepan. Cook for an additional 2 minutes, stirring constantly.
- Add Coconut and Butter: Remove from heat and stir in the shredded coconut, butter, and vanilla extract. Pour the filling into the pre-baked pie crust. Let it cool at room temperature, then refrigerate until set.
- Make the Whipped Cream: In a mixing bowl, beat the heavy cream and powdered sugar until stiff peaks form. Spread or pipe the whipped cream over the chilled coconut filling.
- Serve: Garnish with additional toasted coconut, if desired, and slice to serve. Enjoy your delicious coconut cream pie!
Chocolate Covered Strawberries

Chocolate covered strawberries are a delightful treat that combines the sweetness of ripe strawberries with the rich taste of chocolate. They are perfect for any occasion, whether it’s a romantic dinner, a birthday celebration, or just a sweet snack. The contrast between the juicy fruit and the smooth chocolate creates a satisfying bite that is hard to resist.
This recipe is simple and quick to make, making it a great option for both novice cooks and seasoned bakers. With just a few ingredients, you can whip up a batch of these tasty treats in no time!
Ingredients
- 1 pound fresh strawberries
- 8 ounces dark chocolate, chopped
- 4 ounces white chocolate, chopped
- 1 tablespoon coconut oil (optional)
- Gold leaf or sprinkles for decoration (optional)
Instructions
- Wash and dry the strawberries thoroughly, ensuring no water is left on them.
- Melt the dark chocolate in a microwave-safe bowl, heating in 30-second intervals until smooth. Stir in coconut oil for a shinier finish, if desired.
- Dip each strawberry into the melted dark chocolate, allowing any excess chocolate to drip off.
- Place the dipped strawberries on a parchment-lined baking sheet.
- Melt the white chocolate the same way, and drizzle it over the chocolate-covered strawberries for decoration.
- If using, add gold leaf or sprinkles while the chocolate is still wet.
- Let the strawberries sit at room temperature until the chocolate has set, or chill them in the refrigerator for about 30 minutes.
Brownie Sundae with Nuts
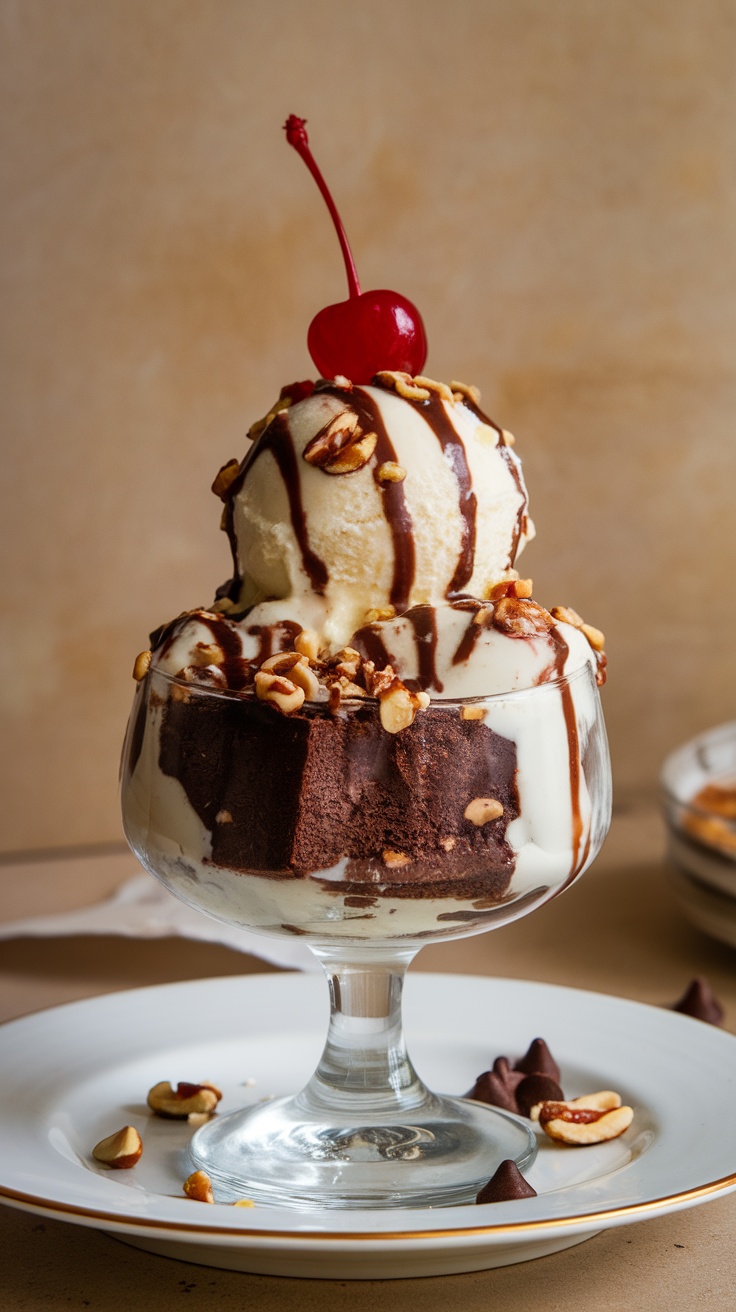
This brownie sundae with nuts is a delightful treat that combines rich chocolate brownies with creamy ice cream, all topped with crunchy nuts and a drizzle of chocolate sauce. It’s a perfect dessert that brings together contrasting textures and flavors in every spoonful.
Making this treat is straightforward and fun! Whether you’re hosting a dinner party or just satisfying a sweet tooth, this recipe is sure to please everyone. It’s quick to assemble, making it a go-to option for both casual nights in and special occasions.
Ingredients
- 1 box brownie mix (plus ingredients as per package)
- 2 cups vanilla ice cream
- 1/4 cup chopped nuts (such as walnuts or pecans)
- 1/4 cup chocolate syrup
- Maraschino cherries for topping
Instructions
- Prepare Brownies: Follow the instructions on the brownie mix box to bake the brownies. Allow them to cool completely.
- Assemble Sundae: Once cooled, cut the brownies into squares. In a serving dish, place a brownie square at the bottom, followed by a scoop of vanilla ice cream.
- Add Toppings: Drizzle chocolate syrup over the ice cream and sprinkle chopped nuts on top. Finish with a maraschino cherry.
- Serve and Enjoy: Repeat the layers in additional dishes as needed. Serve immediately and enjoy your delicious brownie sundae!
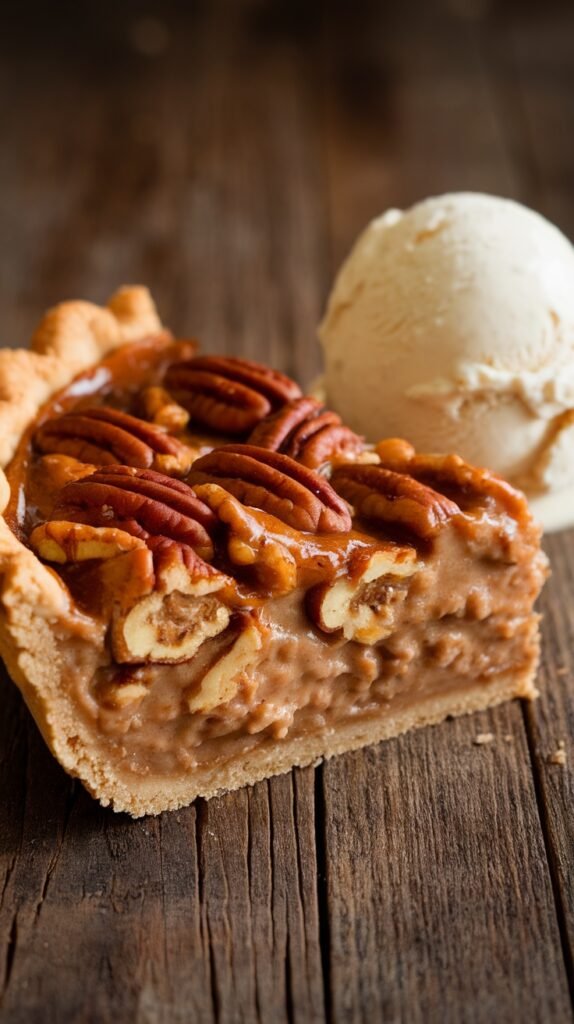
Maple Pecan Pie with a Flaky Crust

Maple pecan pie is a delightful twist on the classic dessert, combining the rich flavors of maple syrup and toasted pecans for a truly indulgent treat. The sweet, nutty filling pairs perfectly with a flaky, buttery crust, creating a harmonious balance of textures and tastes. This pie is simple to make, making it a perfect choice for both novice bakers and seasoned pros alike.
With its warm, comforting flavors, maple pecan pie is ideal for any occasion, from holiday gatherings to cozy weeknight dinners. Serve it warm with a scoop of vanilla ice cream for an extra special touch!
Ingredients
- 1 pre-made pie crust
- 1 cup maple syrup
- 1 cup packed brown sugar
- 1/2 cup unsalted butter, melted
- 4 large eggs
- 1 teaspoon vanilla extract
- 1/4 teaspoon salt
- 2 cups pecan halves
Instructions
- Preheat your oven to 350°F (175°C).
- Fit the pie crust into a 9-inch pie pan and crimp the edges as desired.
- In a large bowl, whisk together the maple syrup, brown sugar, melted butter, eggs, vanilla extract, and salt until well combined.
- Stir in the pecan halves, mixing until they are evenly coated in the filling.
- Pour the pecan mixture into the prepared pie crust, spreading it evenly.
- Bake for 50-60 minutes, or until the filling is set and the crust is golden brown. If the crust starts to brown too quickly, cover the edges with foil.
- Allow the pie to cool before serving. Enjoy your maple pecan pie warm or at room temperature!
Baklava Rolls with Honey Syrup
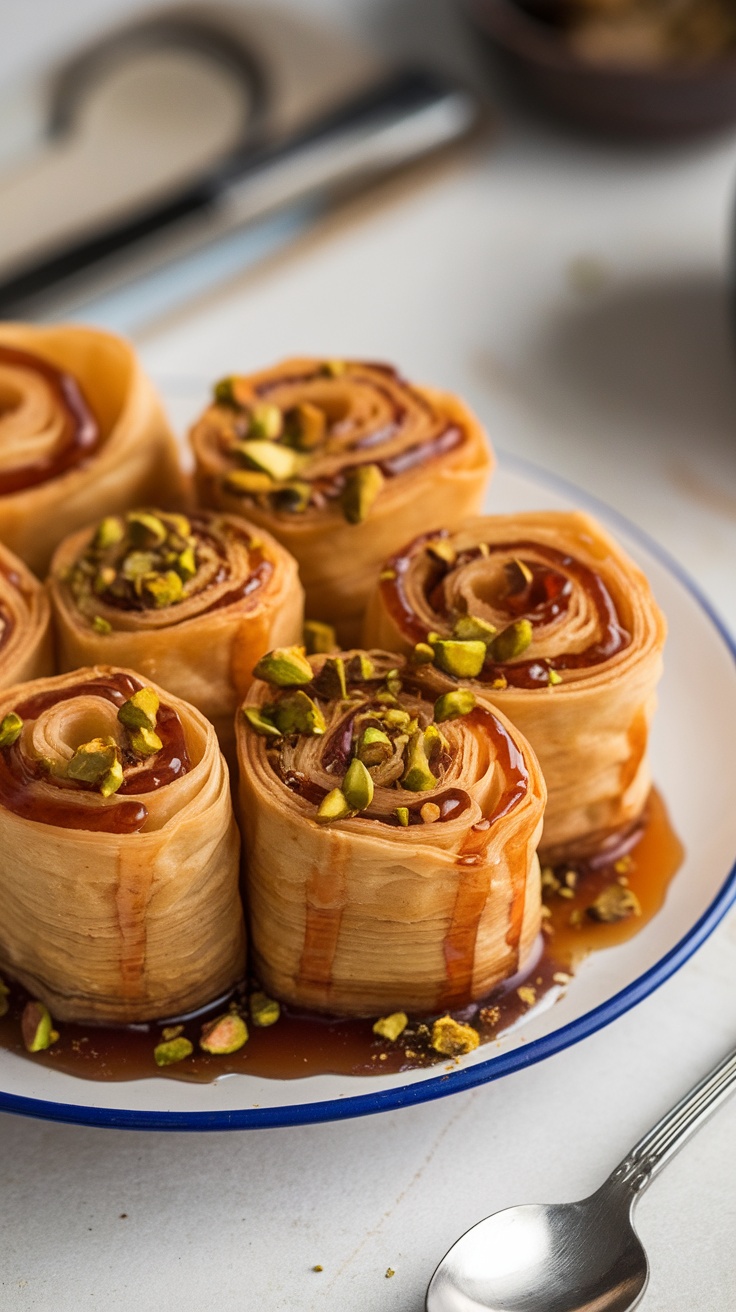
Baklava Rolls are a delightful twist on the traditional baklava. These sweet, flaky pastries are filled with a mixture of nuts and spices, rolled up tightly, and then elegantly drizzled with honey syrup. Each bite is a perfect combination of crunchy and chewy textures, making them an instant favorite at any dinner table.
Not only are they delicious, but they are also surprisingly simple to make. You’ll enjoy the process of layering the dough and creating those perfect rolls. Whether you’re cooking for family or hosting friends, these Baklava Rolls will surely impress everyone with their rich flavors and beautiful presentation.
Ingredients
- 1 package of phyllo dough (16 oz), thawed
- 1 cup unsalted butter, melted
- 2 cups mixed nuts (walnuts, pistachios, almonds), finely chopped
- 1 teaspoon ground cinnamon
- 1 cup granulated sugar
- 1 cup water
- 1/2 cup honey
- 1 teaspoon vanilla extract
Instructions
- Prepare the Nuts: In a bowl, combine chopped nuts and cinnamon. Set aside.
- Layer the Phyllo: Preheat the oven to 350°F (175°C). Take a sheet of phyllo dough and brush it generously with melted butter. Layer another sheet on top and repeat until you have about 5-6 sheets stacked.
- Fill and Roll: Sprinkle a portion of the nut mixture evenly over the phyllo. Starting from one end, tightly roll the phyllo into a log shape. Repeat with remaining sheets and filling.
- Cut and Bake: Place the rolls on a baking sheet lined with parchment paper. Cut each roll into bite-sized pieces. Bake for 25-30 minutes or until golden brown.
- Make the Syrup: In a saucepan, combine sugar, water, honey, and vanilla. Bring to a boil, then reduce heat and simmer for about 10 minutes. Allow to cool slightly.
- Combine: Once the rolls are baked, pour the syrup over the hot baklava rolls and let them soak for a few minutes before serving.
Fruit Tart with Cream Cheese Filling
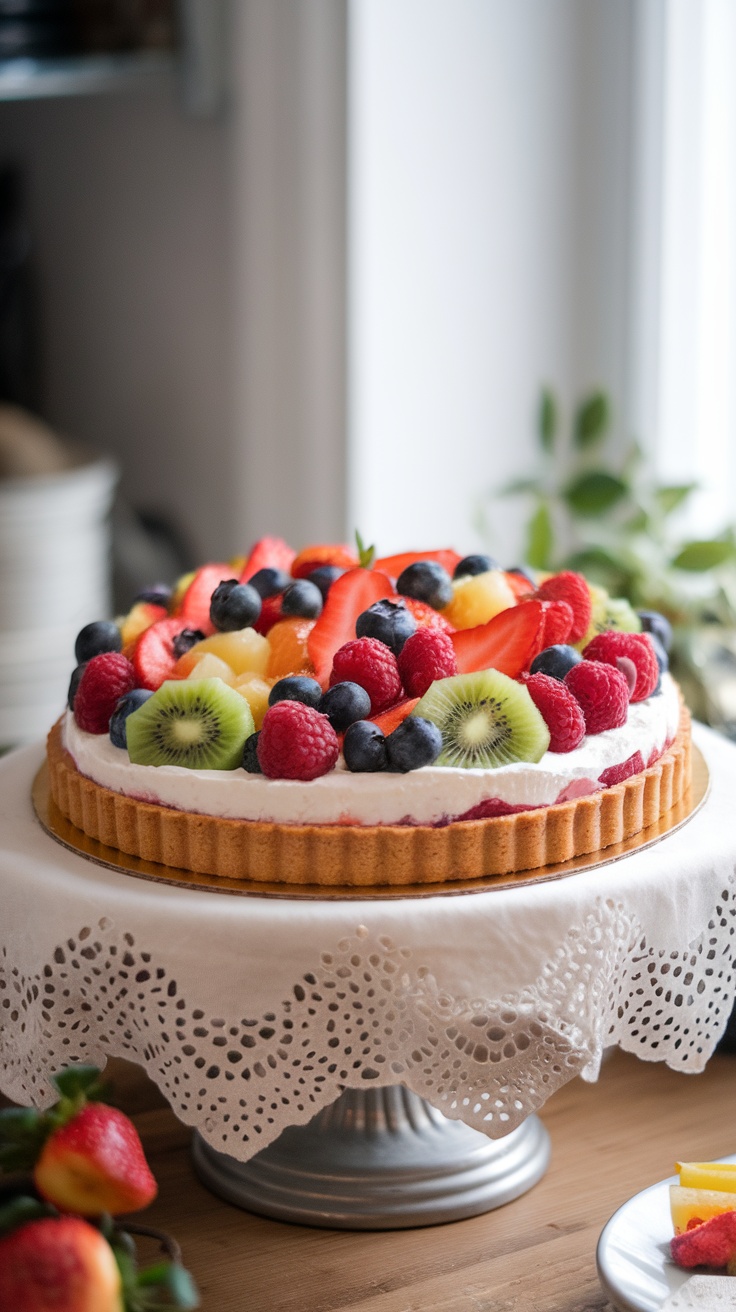
A fruit tart with cream cheese filling is a delightful dessert that combines a flaky crust, a rich and smooth filling, and a vibrant assortment of fresh fruits. The creamy filling adds a touch of sweetness and tanginess, perfectly complementing the natural flavors of the fruit. This recipe is simple enough for any home cook and is sure to impress your family and friends.
The best part about this fruit tart is its versatility. You can use a variety of fruits, depending on the season and your personal preferences. Whether you opt for strawberries, blueberries, kiwi, or a mix, each bite is refreshing and satisfying. It’s a perfect way to end a dinner or to enjoy as a sweet treat during the day.
Ingredients
- 1 pre-made tart crust
- 8 oz cream cheese, softened
- 1/2 cup powdered sugar
- 1 teaspoon vanilla extract
- 1 cup heavy whipping cream
- 2 cups assorted fresh fruits (e.g., strawberries, blueberries, raspberries, kiwi)
- 1/4 cup fruit glaze (optional)
Instructions
- Prepare the Filling: In a mixing bowl, beat the softened cream cheese until smooth. Gradually add powdered sugar and vanilla extract, mixing until well combined.
- Whip the Cream: In another bowl, whip the heavy cream until stiff peaks form. Gently fold the whipped cream into the cream cheese mixture until fully combined.
- Assemble the Tart: Spoon the cream cheese filling into the pre-made tart crust, smoothing it evenly. Arrange the fresh fruits on top in a decorative pattern.
- Glaze the Tart: If using fruit glaze, brush it over the fruits for a shiny finish.
- Chill: Refrigerate the tart for at least 1 hour before serving to allow the flavors to meld.
Chocolate Mousse with Whipped Cream
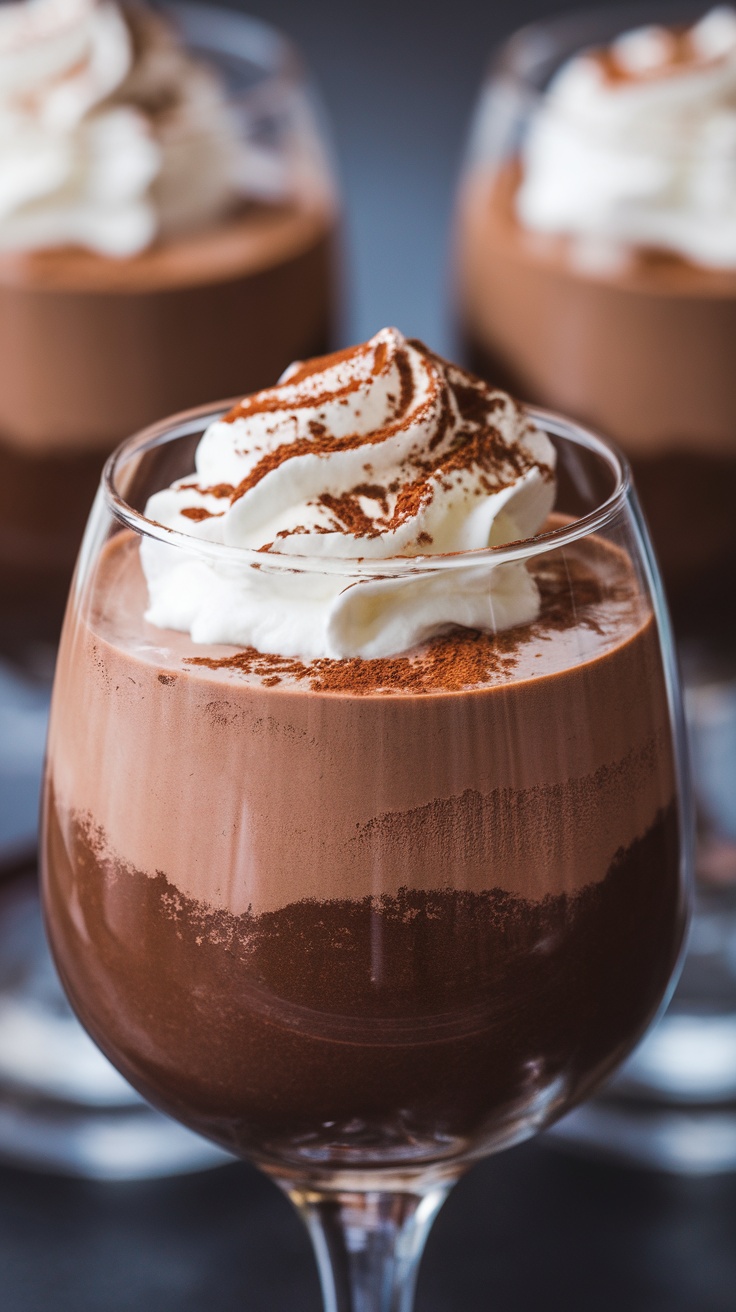
Chocolate mousse is a delightful dessert that combines rich chocolate flavor with a light, airy texture. It’s perfect for satisfying your sweet tooth after dinner. The smoothness of the mousse paired with the fluffy whipped cream makes each bite melt in your mouth. Plus, it’s surprisingly simple to whip up, making it a great choice for both novice cooks and seasoned bakers.
This recipe is versatile as well; you can serve it in individual cups for a fancy touch or in a larger dish for sharing. The chocolate flavor is deep and satisfying, while the whipped cream adds a touch of sweetness and creaminess. Your guests will be impressed!
Ingredients
- 8 ounces dark chocolate, chopped
- 3 tablespoons unsalted butter
- 3 large eggs, separated
- 1/4 cup granulated sugar
- 1/2 teaspoon vanilla extract
- 1 cup heavy cream
- Cocoa powder, for garnish
Instructions
- Melt the Chocolate: In a heatproof bowl, combine the chopped dark chocolate and butter. Melt over a double boiler or in the microwave in short bursts, stirring until smooth. Let it cool slightly.
- Whisk Egg Yolks: In a separate bowl, whisk the egg yolks with granulated sugar and vanilla extract until the mixture is pale and fluffy. Stir in the melted chocolate mixture until fully combined.
- Beat Egg Whites: In another clean bowl, beat the egg whites until soft peaks form. Gently fold the egg whites into the chocolate mixture, being careful not to deflate the air.
- Whip the Cream: In a separate bowl, whip the heavy cream until soft peaks form. Fold the whipped cream into the chocolate mixture until no streaks remain.
- Chill: Spoon the mousse into individual serving cups or a large dish. Refrigerate for at least 2 hours to set.
- Serve: Before serving, top each portion with a dollop of whipped cream and a sprinkle of cocoa powder.
Profiteroles with Vanilla Custard

Profiteroles are delightful little choux pastry puffs filled with creamy vanilla custard. These treats offer a wonderful balance of crispiness from the outer shell and the smooth, rich filling inside. The addition of a chocolate drizzle on top makes them even more tempting!
This recipe is surprisingly easy to make, perfect for impressing family or friends after a nice dinner. With just a few simple steps, you can create a delicious dessert that looks as good as it tastes.
Ingredients
- 1 cup water
- 1/2 cup unsalted butter
- 1 cup all-purpose flour
- 1/4 teaspoon salt
- 4 large eggs
- 2 cups vanilla custard (store-bought or homemade)
- 1/2 cup semi-sweet chocolate chips
- 1 tablespoon vegetable oil
Instructions
- Preheat the oven to 400°F (200°C). Line a baking sheet with parchment paper.
- In a saucepan, combine water and butter over medium heat. Stir until butter melts.
- Add flour and salt to the saucepan, stirring until the mixture forms a ball. Remove from heat and let it cool slightly.
- Beat in eggs one at a time, mixing well after each addition until the batter is smooth.
- Use a piping bag to pipe small mounds of the batter onto the prepared baking sheet, leaving space between each.
- Bake for 20-25 minutes or until golden brown and puffed. Let cool completely.
- Once cool, slice each profiterole in half and fill with vanilla custard.
- For the chocolate drizzle, melt the chocolate chips with vegetable oil in the microwave, stirring until smooth. Drizzle over filled profiteroles before serving.
Lava Cake Donuts with Molten Center
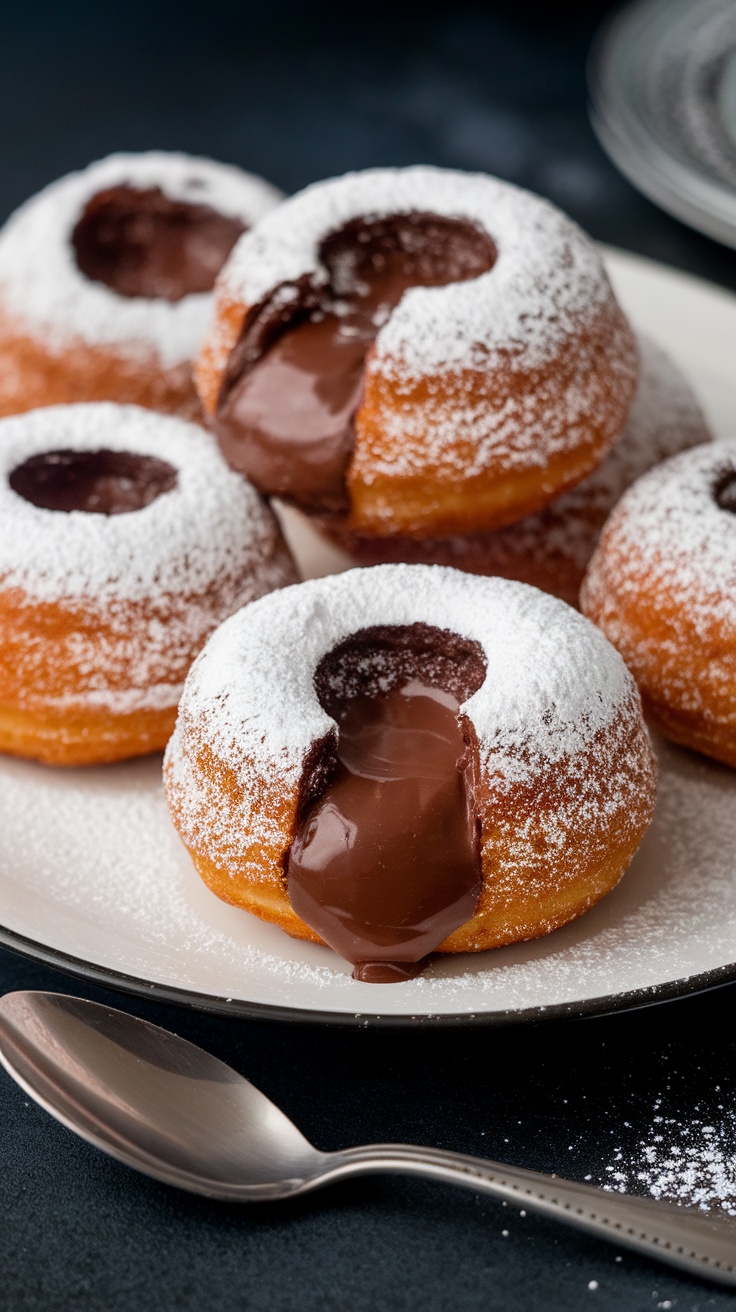
If you’re looking for a sweet treat that combines the best of both worlds, these lava cake donuts are the perfect choice! Imagine biting into a fluffy donut only to be greeted by a gooey, molten chocolate center. They’re rich, indulgent, and simply delightful. Plus, they’re surprisingly easy to make, making them a great option for a cozy night in or a fun dessert for guests.
These donuts are a fun twist on traditional lava cake and are sure to impress anyone with a sweet tooth. They offer that warm, chocolatey goodness that just melts in your mouth. Dusting them with powdered sugar not only adds a touch of elegance but also enhances the visual appeal. Let’s dive into how to whip these up!
Ingredients
- 1 cup all-purpose flour
- 1/2 cup granulated sugar
- 1/4 cup unsweetened cocoa powder
- 1 teaspoon baking powder
- 1/4 teaspoon salt
- 1/2 cup milk
- 1/4 cup vegetable oil
- 1 teaspoon vanilla extract
- 2 large eggs
- 1/2 cup chocolate chips
- Powdered sugar for dusting
Instructions
- Preheat the oven to 350°F (175°C) and grease a donut pan.
- In a large bowl, whisk together flour, sugar, cocoa powder, baking powder, and salt.
- In another bowl, mix milk, vegetable oil, vanilla extract, and eggs until well combined. Gradually add this wet mixture to the dry ingredients and stir just until combined.
- Fold in the chocolate chips for that extra gooeyness.
- Fill each donut mold about halfway with the batter. Bake for 10-12 minutes or until a toothpick inserted into the donut comes out clean (but avoid poking the molten center!).
- Let them cool for a few minutes, then gently remove from the pan.
- Dust with powdered sugar before serving for that delicious finish!
Carrot Cake with Cream Cheese Frosting
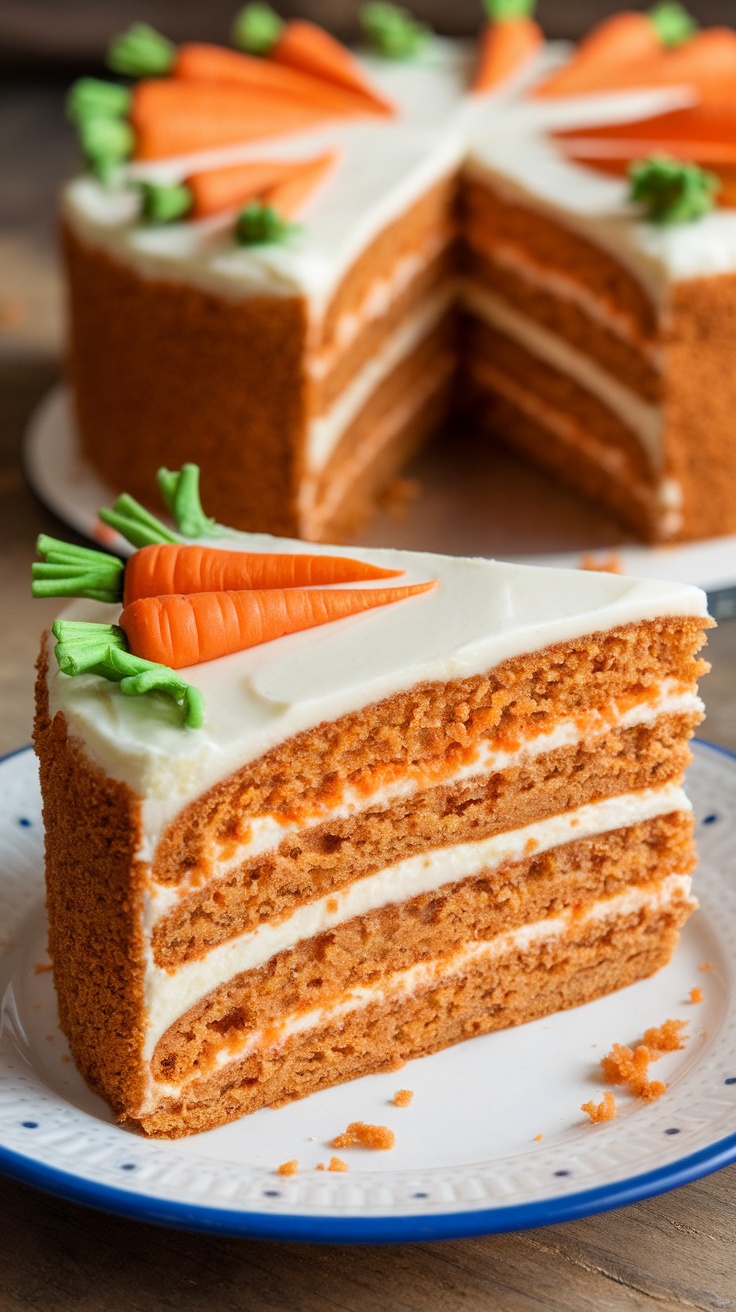
Carrot cake is a delightful treat that combines the warm flavors of spices with the sweetness of carrots. This cake is moist, fluffy, and topped with a rich cream cheese frosting that perfectly complements its flavors. The hint of cinnamon and nutmeg adds a cozy touch, making it an ideal dessert for any occasion.
Making carrot cake is simple and straightforward. With just a few ingredients and easy steps, you can whip up a delicious dessert that everyone will love. Whether it’s for a birthday party or just a sweet ending to your dinner, this cake is sure to impress!
Ingredients
- 2 cups all-purpose flour
- 2 cups granulated sugar
- 1 teaspoon baking powder
- 1 teaspoon baking soda
- 1 teaspoon ground cinnamon
- 1/2 teaspoon ground nutmeg
- 1/2 teaspoon salt
- 1 cup vegetable oil
- 4 large eggs
- 3 cups grated carrots
- 1 cup crushed pineapple, drained
- 1 cup chopped walnuts (optional)
- 8 oz cream cheese, softened
- 1/2 cup unsalted butter, softened
- 4 cups powdered sugar
- 1 teaspoon vanilla extract
Instructions
- Preheat the oven to 350°F (175°C). Grease and flour two 9-inch round cake pans.
- In a large bowl, whisk together flour, sugar, baking powder, baking soda, cinnamon, nutmeg, and salt.
- In another bowl, combine oil, eggs, grated carrots, and pineapple. Mix well.
- Gradually add the wet ingredients to the dry ingredients, stirring until just combined. If desired, fold in walnuts.
- Divide the batter evenly between the prepared pans and bake for 30-35 minutes, or until a toothpick inserted in the center comes out clean. Let them cool in the pans for 10 minutes before transferring to a wire rack to cool completely.
- For the frosting, beat cream cheese and butter in a bowl until smooth. Gradually add powdered sugar and vanilla, mixing until fluffy.
- Once the cakes are completely cooled, spread a layer of frosting on top of one cake layer, place the other layer on top, and frost the top and sides of the cake.
- Decorate with additional walnuts or carrot decorations if desired. Slice and serve!
Orange Olive Oil Cake
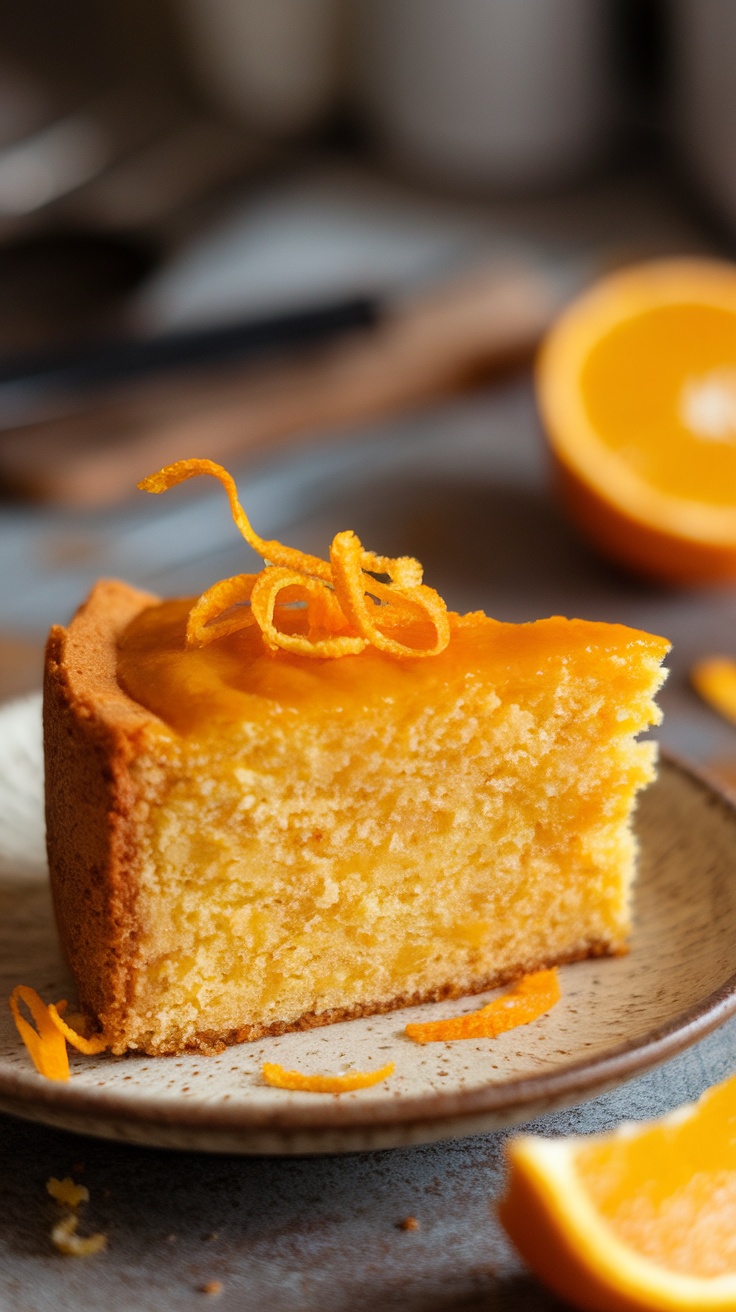
Orange Olive Oil Cake is a delightful dessert that combines the bright, citrusy flavor of oranges with the rich, smooth texture of olive oil. This cake is not only moist but also has a lovely balance of sweetness and tang, making it a perfect treat for any occasion. Easy to make, it’s a great choice for both novice bakers and seasoned chefs looking to impress.
With its unique flavor profile, this cake can be enjoyed on its own or paired with a dollop of whipped cream or a scoop of vanilla ice cream. It’s perfect for a casual dinner or a special gathering. The addition of olive oil adds a subtle depth, transforming a simple cake into something truly special.
Ingredients
- 1 1/2 cups all-purpose flour
- 1 cup granulated sugar
- 1/2 cup extra virgin olive oil
- 3 large eggs
- 1/2 cup fresh orange juice
- Zest of 2 oranges
- 1 teaspoon baking powder
- 1/2 teaspoon salt
- 1/4 teaspoon baking soda
Instructions
- Preheat the oven to 350°F (175°C). Grease and flour a 9-inch round cake pan.
- In a large bowl, whisk together the flour, baking powder, baking soda, and salt.
- In another bowl, mix the sugar and olive oil until well combined. Add the eggs one at a time, mixing well after each addition.
- Stir in the orange juice and zest until fully incorporated.
- Gradually add the dry ingredients to the wet ingredients, mixing until just combined.
- Pour the batter into the prepared cake pan and smooth the top.
- Bake for 30-35 minutes, or until a toothpick inserted into the center comes out clean.
- Allow the cake to cool in the pan for 10 minutes, then transfer it to a wire rack to cool completely before serving.
Chocolate Chip Banana Bread Pudding
Chocolate Chip Banana Bread Pudding is a delightful twist on traditional bread pudding that combines rich flavors and comforting textures. The sweetness of ripe bananas mingles with gooey chocolate chips, creating a warm and indulgent dessert that’s perfect for any occasion.
Best of all, this recipe is simple to make and requires just a few ingredients. It’s the kind of dessert that brings everyone together, making it a hit at dinner parties or family gatherings.
Ingredients
- 4 cups day-old bread, cubed
- 2 ripe bananas, mashed
- 1 cup chocolate chips
- 2 cups milk
- 4 large eggs
- 1/2 cup granulated sugar
- 1 teaspoon vanilla extract
- 1/2 teaspoon cinnamon
- A pinch of salt
Instructions
- Preheat your oven to 350°F (175°C) and grease a baking dish.
- In a large bowl, whisk together the milk, eggs, sugar, vanilla, cinnamon, and salt until well combined.
- Gently fold in the mashed bananas, cubed bread, and chocolate chips until the bread is soaked in the mixture.
- Pour the mixture into the greased baking dish and let it sit for about 10 minutes to absorb flavors.
- Bake for 30-35 minutes, or until set and golden brown on top. Let it cool slightly before serving.
Strawberry Shortcake with Whipped Cream
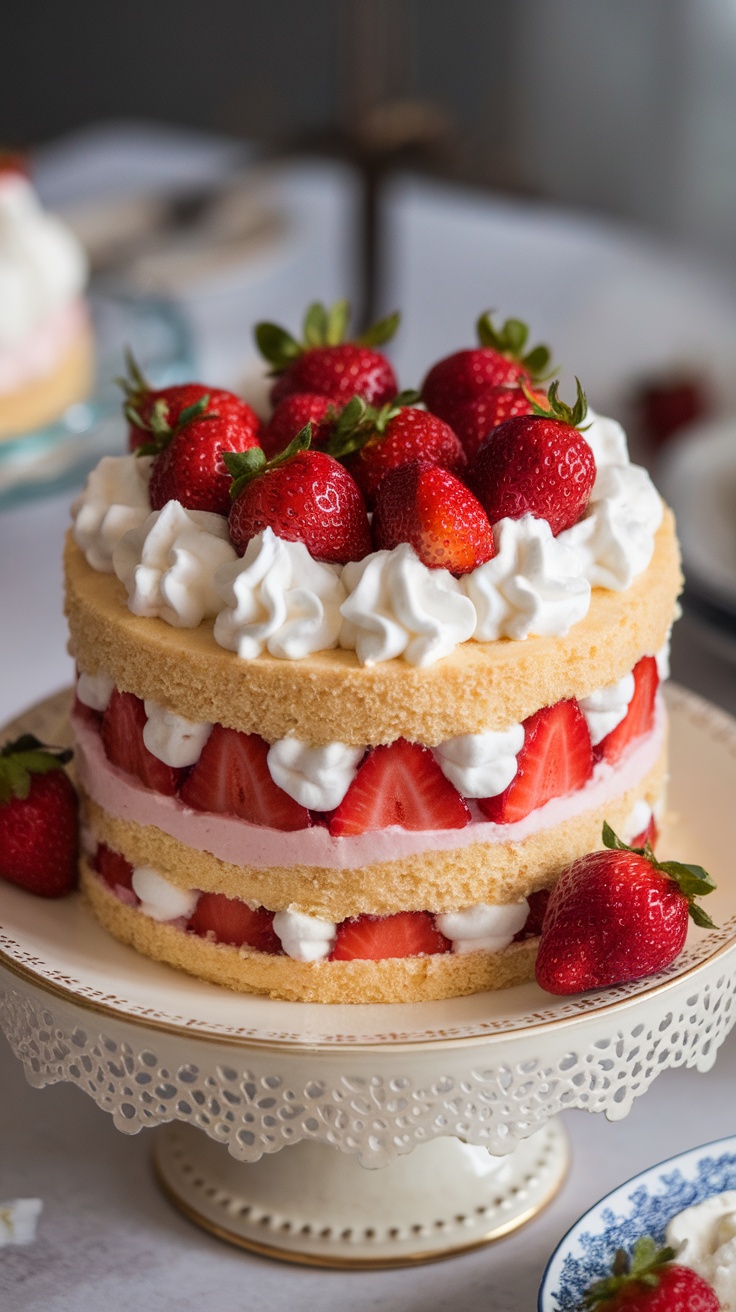
Strawberry shortcake is a delightful dessert that combines fluffy cake, sweet strawberries, and rich whipped cream. The lightness of the cake pairs perfectly with the juiciness of the strawberries, creating a sweet and fruity treat that feels like a celebration in every bite. It’s an easy recipe, perfect for both novice bakers and seasoned pros.
This dessert is not only simple to make, but it also looks impressive when served. It’s a great way to showcase fresh strawberries, especially during the summer months. Whether you’re hosting a gathering or just treating yourself, strawberry shortcake is sure to please!
Ingredients
- 1 pound fresh strawberries, hulled and sliced
- 1/4 cup granulated sugar
- 2 cups all-purpose flour
- 1/2 cup granulated sugar
- 1 tablespoon baking powder
- 1/2 teaspoon salt
- 1/2 cup unsalted butter, softened
- 1 cup milk
- 1 teaspoon vanilla extract
- 1 cup heavy cream
- 2 tablespoons powdered sugar
Instructions
- Prepare the Strawberries: In a bowl, mix the sliced strawberries with 1/4 cup of granulated sugar. Let them sit for about 30 minutes to macerate and release their juices.
- Make the Cake: Preheat your oven to 350°F (175°C). In a mixing bowl, combine flour, 1/2 cup of granulated sugar, baking powder, and salt. Add the softened butter, milk, and vanilla extract, and mix until smooth.
- Bake the Cake: Pour the batter into a greased round cake pan. Bake for 25-30 minutes or until a toothpick comes out clean. Allow the cake to cool in the pan for 10 minutes before transferring to a wire rack.
- Prepare the Whipped Cream: In a separate bowl, beat the heavy cream with powdered sugar until soft peaks form.
- Assemble the Shortcake: Once the cake has cooled, slice it into two layers. Place one layer on a serving dish, top with a layer of macerated strawberries and whipped cream. Add the second layer of cake and repeat the process on top. Finish with more strawberries and whipped cream.
Tropical Coconut Rice Pudding
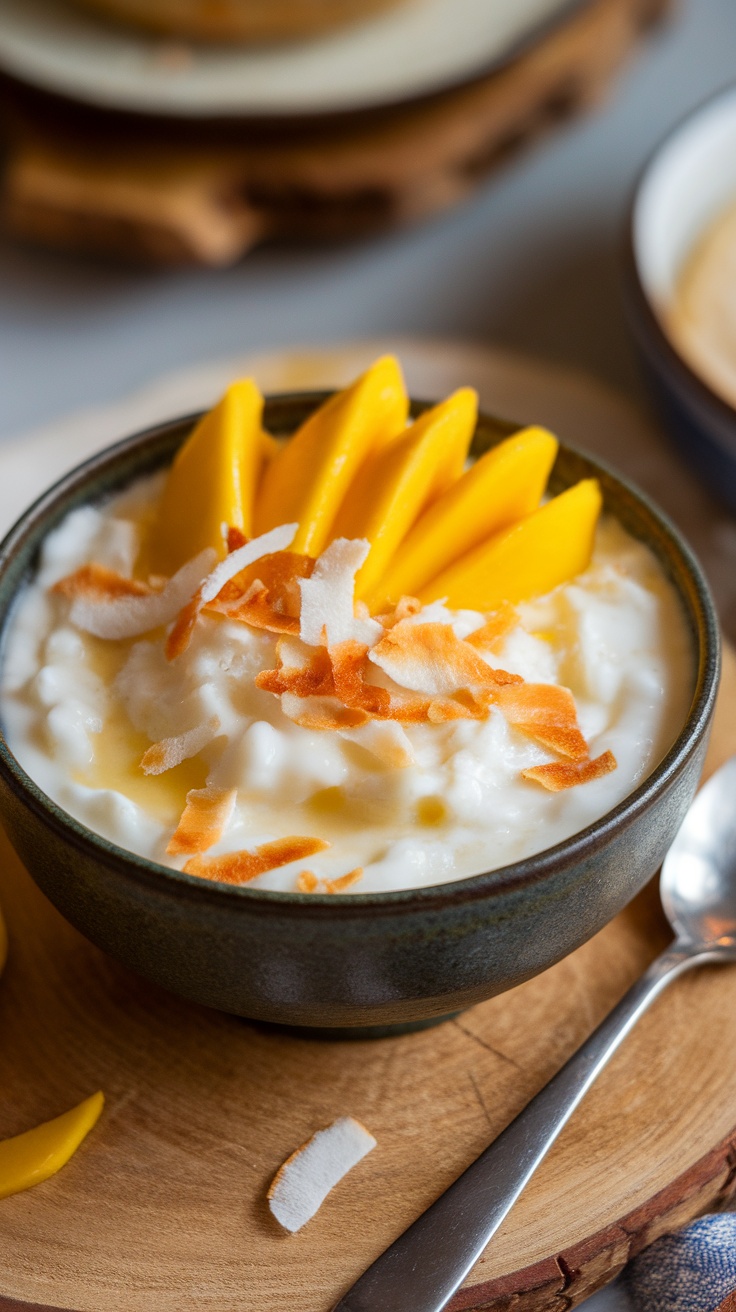
Tropical Coconut Rice Pudding is a delightful dessert that combines the creaminess of coconut milk with the comforting texture of rice. This dish is not only delicious, but it’s also quite easy to prepare, making it a perfect treat for any occasion. The combination of coconut and fresh fruit gives it a refreshing twist that makes it feel like a mini vacation in a bowl!
With its subtle sweetness and creamy consistency, this pudding is sure to satisfy your sweet tooth. Top it off with some fresh mango slices and toasted coconut for an extra burst of flavor and texture. It’s a simple recipe that yields impressive results, making it a great choice for gatherings or a cozy night in.
Ingredients
- 1 cup jasmine rice
- 2 cups coconut milk
- 1/2 cup water
- 1/4 cup sugar
- 1/4 teaspoon salt
- 1 teaspoon vanilla extract
- 1 ripe mango, sliced
- 1/4 cup toasted coconut flakes
Instructions
- Rinse the rice under cold water until the water runs clear. Drain well.
- In a medium saucepan, combine the rice, coconut milk, water, sugar, and salt. Bring to a boil over medium heat.
- Reduce the heat to low and cover, simmering for about 20 minutes or until the rice is tender and the mixture is creamy.
- Stir in the vanilla extract and let the pudding cool slightly.
- Serve warm or chilled, topped with mango slices and toasted coconut flakes.
Coffee Ice Cream Float
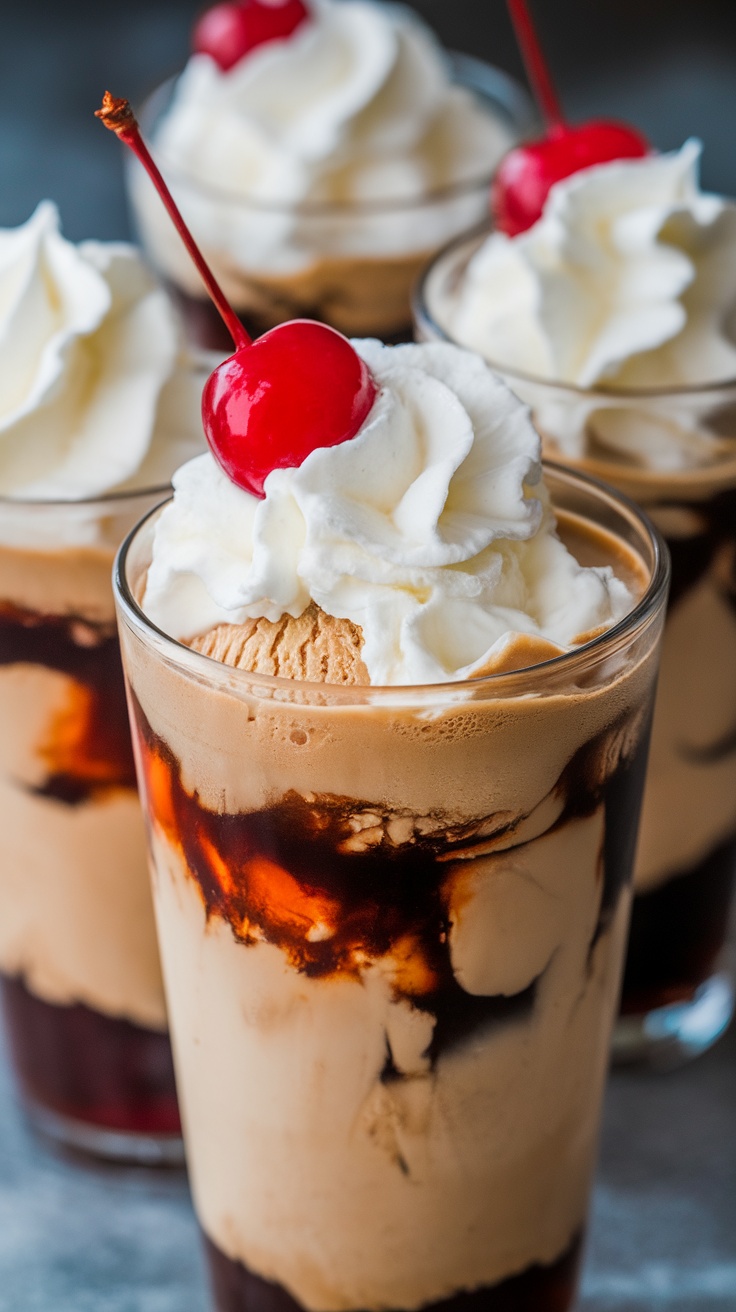
A Coffee Ice Cream Float is a delightful twist on your typical dessert. Combining rich coffee flavor with creamy ice cream, it creates a perfect balance of warmth and chill. The sweetness of the ice cream melts into the coffee, making each sip a delicious experience.
This treat is super easy to whip up, making it ideal for any occasion. Whether it’s a warm evening or a cozy night in, this float brings joy with every delicious layer.
Molten Chocolate Mug Cake
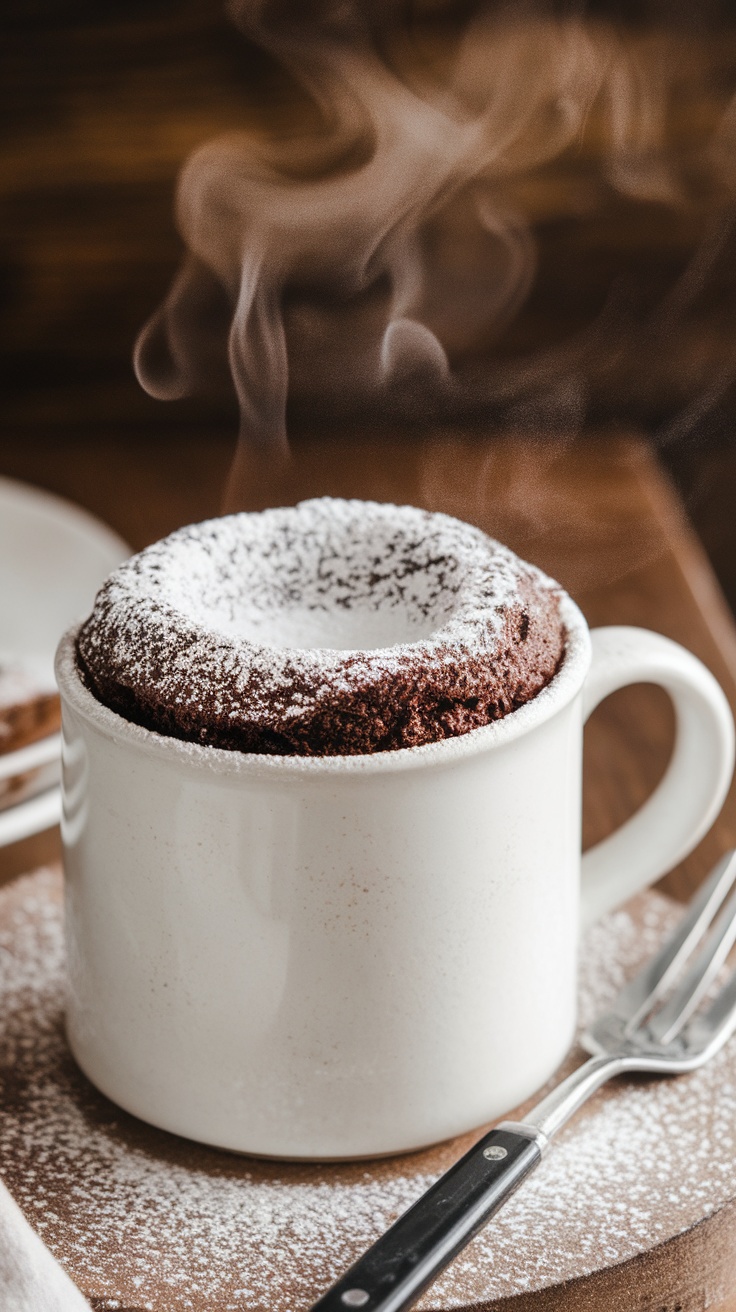
If you’re craving something rich and sweet but want it fast, a molten chocolate mug cake is the answer. This dessert combines simplicity with indulgence, offering a warm, gooey chocolate center that’s hard to resist. Plus, it’s made in just a few minutes, making it perfect for a late-night treat or a quick finish to dinner.
The best part? You can personalize it with your favorite toppings like ice cream or whipped cream. It’s perfect for satisfying those sweet cravings without the hassle of a full baking session.
Ingredients
- 4 tablespoons all-purpose flour
- 4 tablespoons granulated sugar
- 2 tablespoons unsweetened cocoa powder
- 1/8 teaspoon baking powder
- 3 tablespoons milk
- 2 tablespoons vegetable oil
- 1/4 teaspoon vanilla extract
- 1 tablespoon chocolate chips (optional)
Instructions
- In a microwave-safe mug, mix the flour, sugar, cocoa powder, and baking powder until well combined.
- Add the milk, vegetable oil, and vanilla extract to the dry ingredients. Stir until smooth.
- If you’re using chocolate chips, fold them into the batter.
- Microwave the mug for about 40-60 seconds, or until the cake has risen and is set but still slightly gooey in the middle.
- Let it cool for a minute, then enjoy it straight from the mug or topped with your favorite dessert toppings.
Gooey Butter Cake with Powdered Sugar
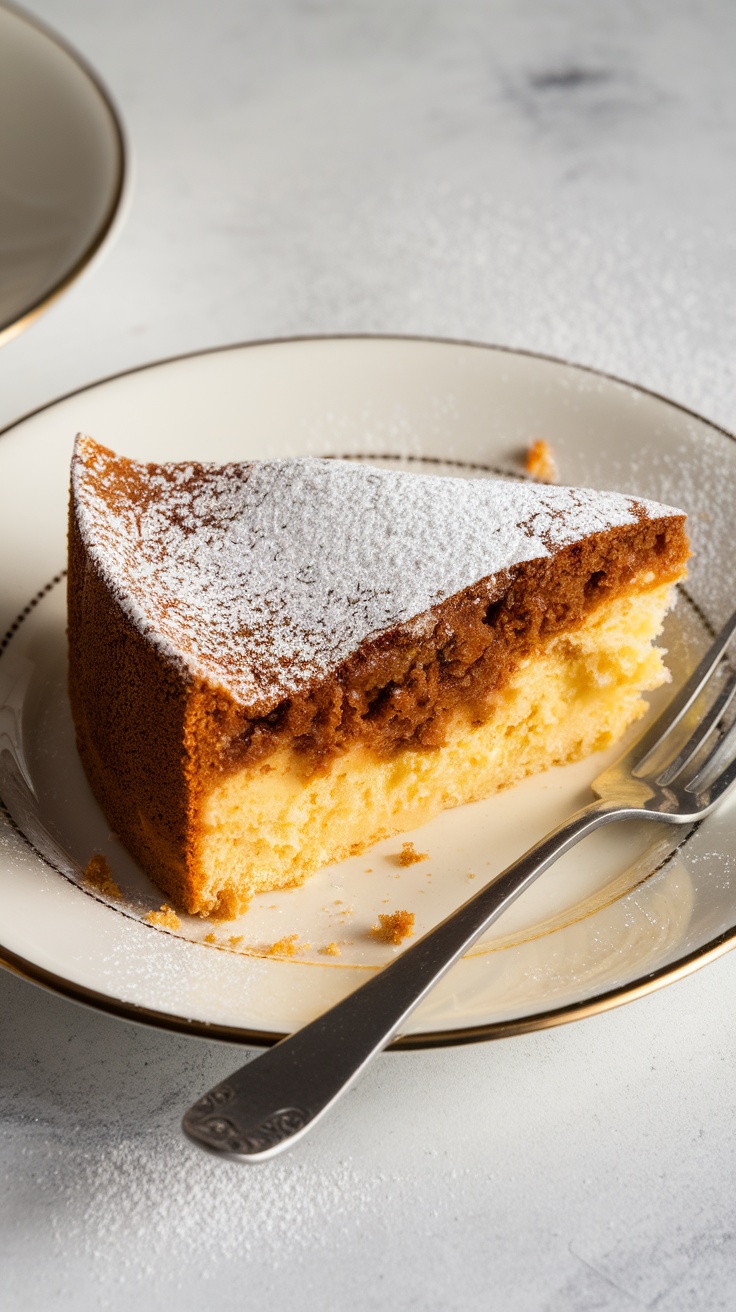
Gooey Butter Cake is a delightful dessert that combines a rich, buttery flavor with a unique texture that’s both dense and creamy. This cake is often a favorite for gatherings, with its sweet, gooey filling and light dusting of powdered sugar on top. It’s super simple to make, requiring just a few ingredients, making it perfect for both novice and experienced bakers alike.
The taste is a heavenly mix of sweet and buttery that melts in your mouth, leaving you wanting more. This dessert is great for any occasion, whether it’s a family dinner or a casual get-together with friends. Let’s get started with a quick and easy recipe!
Chilled Avocado Chocolate Mousse
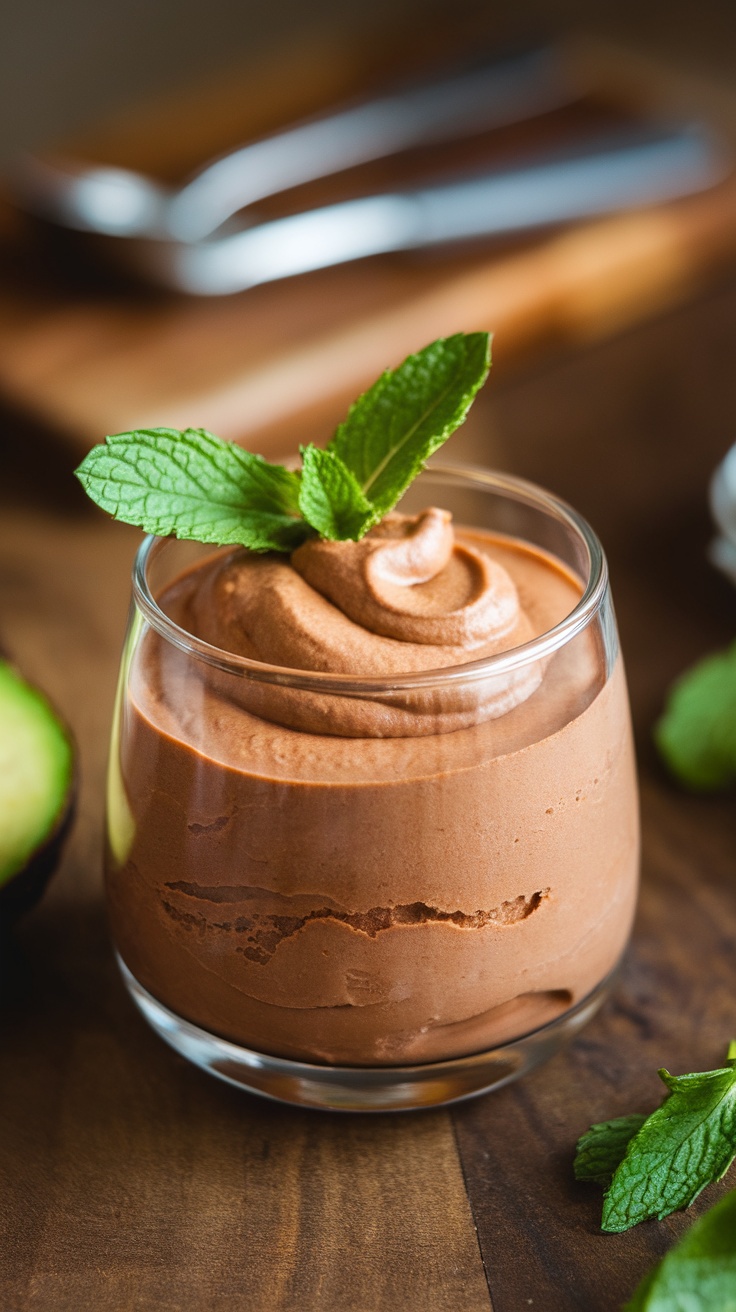
Chilled avocado chocolate mousse is a delightful dessert that surprises everyone with its creamy texture and rich chocolate flavor. This treat is not only tasty but also a healthier alternative to traditional mousses, making it a perfect choice for any occasion.
Simple to prepare, this mousse requires just a handful of ingredients. The combination of ripe avocados and cocoa powder creates a luscious, velvety dessert that feels indulgent without the guilt. It’s a hit among both chocolate lovers and those seeking a lighter dessert option.
Ingredients
- 2 ripe avocados
- 1/2 cup unsweetened cocoa powder
- 1/4 cup honey or maple syrup
- 1/4 cup coconut milk
- 1 teaspoon vanilla extract
- A pinch of salt
Instructions
- Prepare the Avocados: Cut the avocados in half, remove the pits, and scoop the flesh into a blender or food processor.
- Blend the Ingredients: Add the cocoa powder, honey or maple syrup, coconut milk, vanilla extract, and salt to the blender. Blend until smooth and creamy.
- Taste and Adjust: Taste the mousse and adjust the sweetness if needed by adding more honey or syrup. Blend again to combine.
- Chill: Transfer the mousse into serving cups or bowls. Refrigerate for at least 30 minutes to set.
- Serve: Garnish with fresh mint or fruit, if desired, and enjoy your refreshing dessert!
Gingerbread Cookies with Icing

Gingerbread cookies bring a cozy, spiced flavor that reminds us of holiday traditions. They’re soft on the inside with a slightly crisp edge, making every bite a delightful treat. Decorating them with icing adds a fun, personal touch, especially when getting the kids involved!
This recipe is simple enough for bakers of all levels. It requires basic ingredients and can be made in no time. Plus, the icing gives you a chance to get creative and make each cookie unique!
Ingredients
- 3 cups all-purpose flour
- 3/4 cup brown sugar, packed
- 1 tablespoon ground ginger
- 1 tablespoon ground cinnamon
- 1/2 teaspoon ground nutmeg
- 1 teaspoon baking soda
- 1/2 teaspoon salt
- 1/2 cup unsalted butter, softened
- 1 large egg
- 1/2 cup molasses
- 2 cups powdered sugar (for icing)
- 2 tablespoons water (for icing)
- Food coloring (optional)
Instructions
- Make the Dough: In a large bowl, combine flour, brown sugar, ginger, cinnamon, nutmeg, baking soda, and salt. In another bowl, beat together softened butter, egg, and molasses. Gradually mix the wet ingredients into the dry ingredients until combined.
- Chill the Dough: Wrap the dough in plastic wrap and refrigerate for at least 2 hours or overnight for easier rolling.
- Preheat and Roll: Preheat your oven to 350°F (175°C). On a floured surface, roll out the dough to about 1/4 inch thickness. Use cookie cutters to cut out shapes and place them on baking sheets lined with parchment paper.
- Bake: Bake for 8-10 minutes or until the edges are firm. Let them cool on a wire rack.
- Make the Icing: In a bowl, mix powdered sugar with water until smooth. If desired, divide the icing and add food coloring. Decorate cooled cookies with icing and any other fun toppings!
Mini Cheesecakes with Fruit Toppings
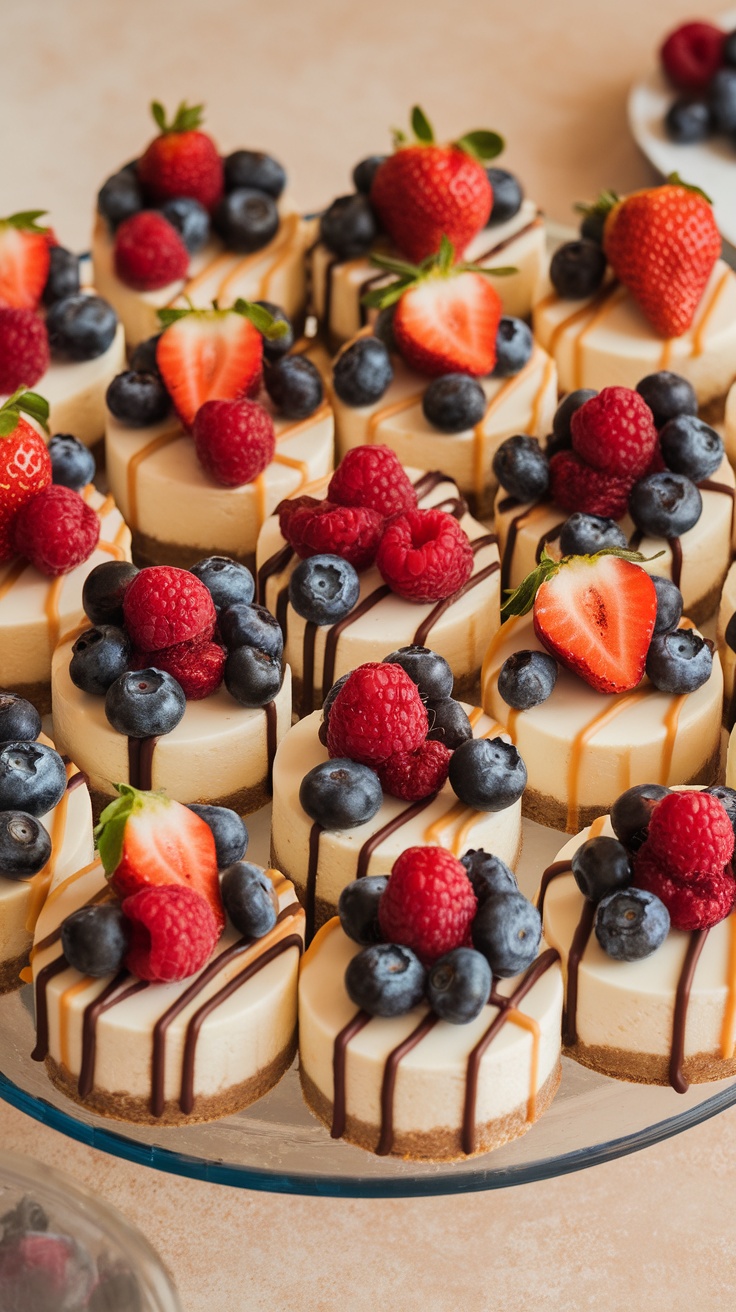
Mini cheesecakes topped with fresh fruit are a delightful treat that balances creamy, rich flavors with a burst of fruity freshness. These bite-sized desserts are not only incredibly tasty but also super easy to whip up, making them perfect for any gathering or even a cozy night in.
With a simple graham cracker crust and a smooth cheesecake filling, these mini delights can be customized with your favorite fruits. Whether you top them with strawberries, blueberries, or raspberries, each bite is a little piece of heaven!
Ingredients
- 1 cup graham cracker crumbs
- 1/4 cup granulated sugar
- 1/4 cup unsalted butter, melted
- 16 ounces cream cheese, softened
- 1/2 cup granulated sugar
- 2 large eggs
- 1 teaspoon vanilla extract
- 1 cup assorted fresh fruits (strawberries, blueberries, raspberries)
- Chocolate or caramel sauce (optional, for drizzling)
Instructions
- Preheat your oven to 325°F (160°C). Line a muffin tin with cupcake liners.
- In a bowl, combine graham cracker crumbs, 1/4 cup sugar, and melted butter. Mix until well combined.
- Press about 1 tablespoon of the crumb mixture into the bottom of each cupcake liner to form the crust.
- In a separate bowl, beat the cream cheese and 1/2 cup sugar until smooth and creamy. Add eggs one at a time, mixing well after each addition, then stir in vanilla.
- Pour the cheesecake mixture over the crusts in the liners, filling them about 2/3 full.
- Bake for 18-20 minutes, or until the centers are set. Allow to cool completely before removing from the tin.
- Once cooled, top each mini cheesecake with fresh fruits and drizzle with chocolate or caramel sauce if desired. Serve and enjoy!
Bourbon Peach Cobbler
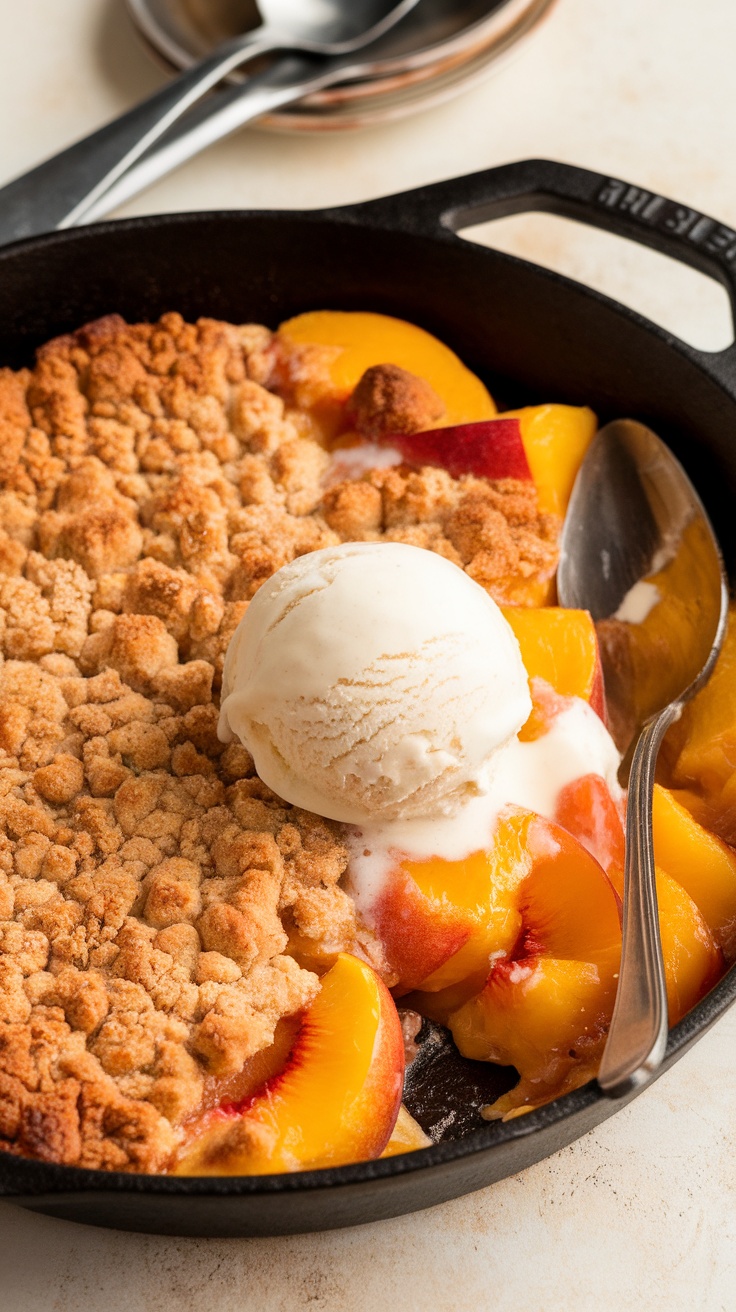
Bourbon peach cobbler is a delightful twist on a classic dessert. The sweetness of ripe peaches pairs perfectly with a splash of bourbon, adding a depth of flavor that makes each bite unforgettable. This dish is simple to make, making it perfect for any weeknight dinner or special occasion.
The buttery, crumbly topping contrasts beautifully with the juicy peaches, creating a warm and comforting dessert that everyone will love. Serve it warm with a scoop of vanilla ice cream for an indulgent treat that’s sure to impress!
Ingredients
- 4 cups fresh peaches, sliced
- 1 cup granulated sugar
- 2 tablespoons bourbon
- 1 teaspoon vanilla extract
- 1 tablespoon lemon juice
- 1/2 teaspoon ground cinnamon
- 1 cup all-purpose flour
- 1/2 cup rolled oats
- 1/2 cup packed brown sugar
- 1/2 cup unsalted butter, melted
- 1/4 teaspoon salt
Instructions
- Preheat the oven to 350°F (175°C).
- In a bowl, combine sliced peaches, granulated sugar, bourbon, vanilla extract, lemon juice, and cinnamon. Mix well and pour into a greased baking dish.
- In another bowl, mix together flour, oats, brown sugar, melted butter, and salt until crumbly. Sprinkle this mixture evenly over the peaches.
- Bake for 30-35 minutes, or until the topping is golden brown and the peaches are bubbly.
- Let cool slightly before serving. Enjoy warm, topped with vanilla ice cream!
Chilled Mango Pudding with Coconut
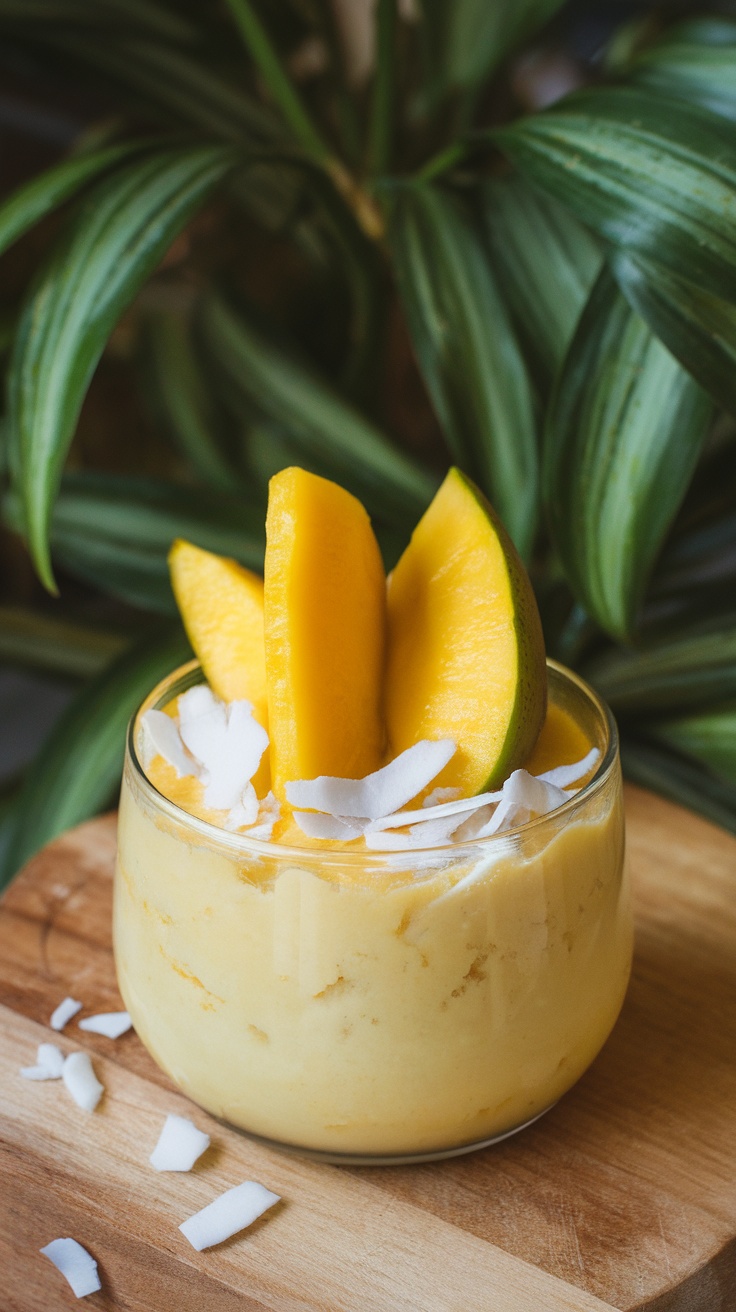
This chilled mango pudding is the perfect blend of tropical flavors and creamy texture. The sweet mango pairs beautifully with coconut, creating a refreshing dessert that’s easy to make and delightful to eat. Whether you’re hosting a summer gathering or just want a sweet treat, this pudding won’t disappoint.
It’s a straightforward recipe that requires minimal ingredients and effort. Simply blend, chill, and serve! Your guests will love the vibrant color and delicious taste, making it a hit at any dinner party.
Ingredients
- 2 ripe mangoes, peeled and diced
- 1 cup coconut milk
- 1/2 cup sugar
- 2 teaspoons gelatin powder
- 1/4 cup water
- 1 teaspoon vanilla extract
- 1/4 cup shredded coconut (optional for topping)
Instructions
- Prepare the Gelatin: In a small bowl, sprinkle gelatin over water and let it sit for about 5 minutes to bloom.
- Blend the Mango: In a blender, combine diced mangoes, coconut milk, sugar, and vanilla extract. Blend until smooth.
- Melt the Gelatin: Gently heat the bloomed gelatin in the microwave or on the stove until fully dissolved. Stir the melted gelatin into the mango mixture.
- Chill: Pour the mixture into dessert cups and refrigerate for at least 2 hours, or until set.
- Serve: Top with shredded coconut before serving for an extra tropical touch.
Saffron Rice Pudding with Pistachios
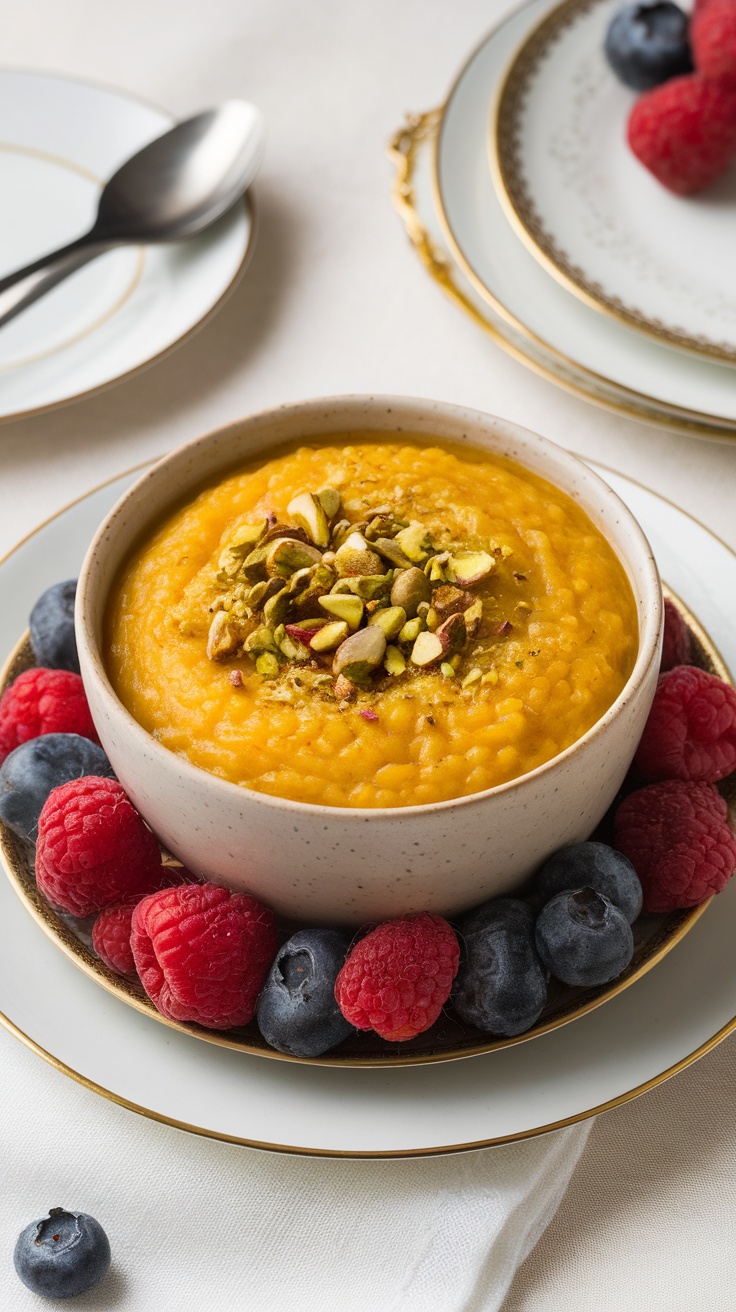
Saffron Rice Pudding is a creamy, dreamy dessert that blends the warmth of saffron with the richness of rice and milk. The delicate floral notes of saffron add a luxurious touch, while the subtle crunch of pistachios provides a delightful contrast. This dish is simple to whip up, making it perfect for both casual dinners and special occasions.
Every spoonful offers a comforting experience, and it’s easy to customize with your favorite toppings or fruit. It’s a wonderful way to end a meal, leaving you feeling satisfied and happy.
Ingredients
- 1 cup Arborio rice
- 4 cups whole milk
- 1/2 cup sugar
- 1/4 teaspoon saffron threads
- 1/2 teaspoon vanilla extract
- 1/4 teaspoon salt
- 1/4 cup chopped pistachios
- Fresh berries for garnish (optional)
Instructions
- Rinse the Arborio rice under cold water until the water runs clear. This helps to remove excess starch.
- In a medium saucepan, combine the rice and milk. Bring to a gentle boil over medium heat, then reduce to a simmer.
- Stir in the sugar, saffron, vanilla extract, and salt. Cook for about 30-40 minutes, stirring frequently, until the rice is tender and the mixture has thickened.
- Remove from heat and let it cool slightly. The pudding will continue to thicken as it cools.
- Serve warm or chilled, topped with chopped pistachios and fresh berries if desired.
Nutella Stuffed Pancakes
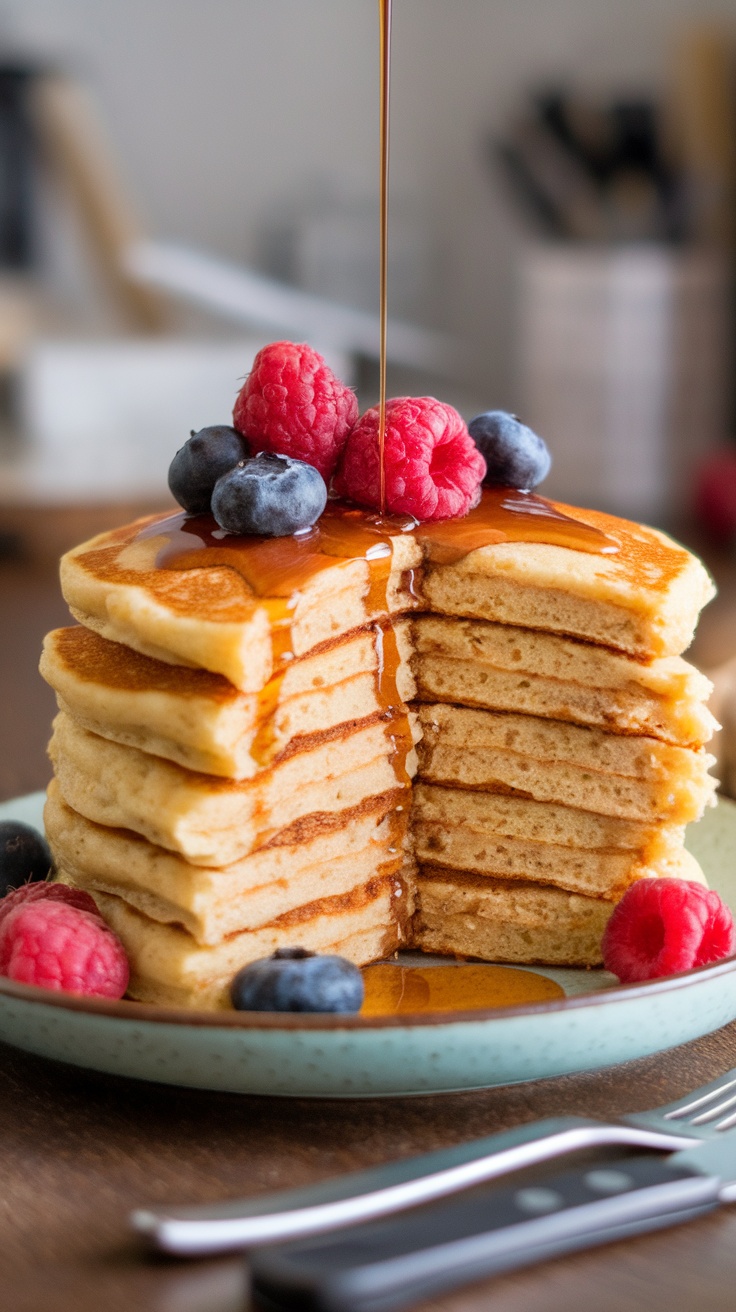
Nobody can resist the charm of Nutella stuffed pancakes! Fluffy and warm, these pancakes are not just breakfast; they’re a delightful treat that can cap off your dinner perfectly. With a rich, gooey center of Nutella, every bite is a sweet surprise, making this dish a favorite for both kids and adults.
What makes these pancakes great is their simplicity. You don’t need to be a culinary expert to whip up this indulgent dessert. Just a few basic ingredients come together for a quick and satisfying treat that feels like a special occasion. Add a drizzle of syrup and some fresh berries, and you have a dreamy dessert that’s sure to impress.
Ingredients
- 1 cup all-purpose flour
- 2 tablespoons sugar
- 1 tablespoon baking powder
- 1/2 teaspoon salt
- 1 cup milk
- 1 large egg
- 2 tablespoons unsalted butter, melted
- 1/2 cup Nutella
- Butter or oil for cooking
- Fresh berries and maple syrup for serving
Instructions
- Mix the Batter: In a bowl, whisk together flour, sugar, baking powder, and salt. In another bowl, combine milk, egg, and melted butter. Pour the wet ingredients into the dry ingredients and mix until just combined.
- Prepare the Pan: Heat a non-stick skillet over medium heat and lightly grease it with butter or oil.
- Cook the Pancakes: Pour about 1/4 cup of batter onto the skillet. Let it cook for 2-3 minutes until bubbles form on the surface. Spoon about a tablespoon of Nutella in the center, then cover with a little more batter.
- Flip: Carefully flip the pancake and cook for another 2-3 minutes until golden brown. Repeat with the remaining batter.
- Serve: Stack the pancakes on a plate, drizzle with maple syrup, and top with fresh berries. Enjoy your delicious Nutella stuffed pancakes!
Chocolate Pretzel Bark
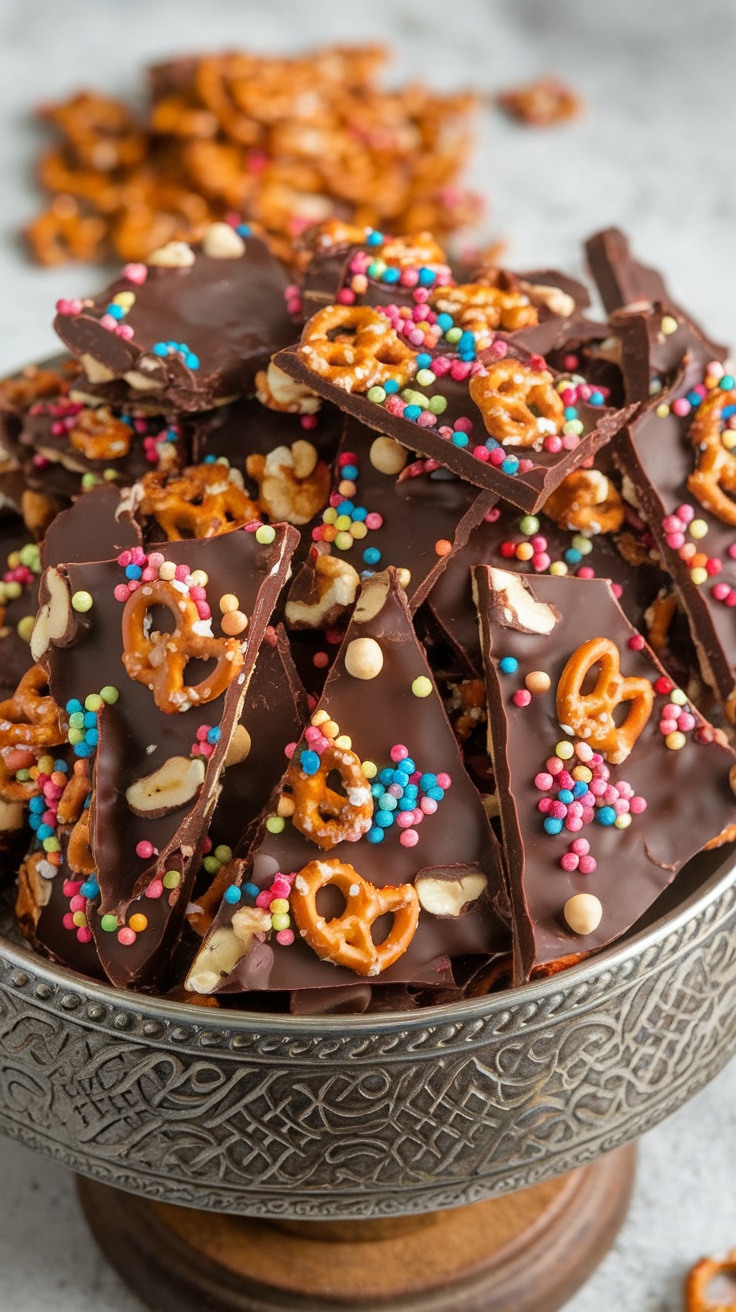
Chocolate pretzel bark is a delightful treat that combines the rich, smooth taste of chocolate with the satisfying crunch of pretzels. This dessert is not only simple to make, but it also offers a perfect balance of sweet and salty flavors that will keep you coming back for more. It’s great for sharing at parties or enjoying as a late-night snack.
Making this bark requires minimal effort and a few ingredients. Melted chocolate is spread over a layer of pretzels, then topped with colorful sprinkles or nuts, allowing for creativity based on your taste. Once cooled, break it into pieces, and you have a stunning and delicious dessert ready to impress!
Ingredients
- 2 cups chocolate chips (dark, milk, or white)
- 3 cups pretzel sticks or mini pretzels
- 1/2 cup chopped nuts (optional)
- 1/4 cup colorful sprinkles
Instructions
- Prepare the Baking Sheet: Line a baking sheet with parchment paper for easy removal.
- Melt the Chocolate: In a microwave-safe bowl, melt the chocolate chips in 30-second intervals, stirring between each until smooth.
- Add the Pretzels: Spread the melted chocolate evenly over the lined baking sheet. Arrange the pretzels on top, pressing them gently into the chocolate.
- Top it Off: Sprinkle chopped nuts and colorful sprinkles over the pretzels and chocolate.
- Chill: Allow the bark to cool in the refrigerator for about 30 minutes, or until set.
- Break and Serve: Once set, break the bark into pieces and serve. Enjoy your homemade chocolate pretzel bark!
Lavender Lemonade Cake
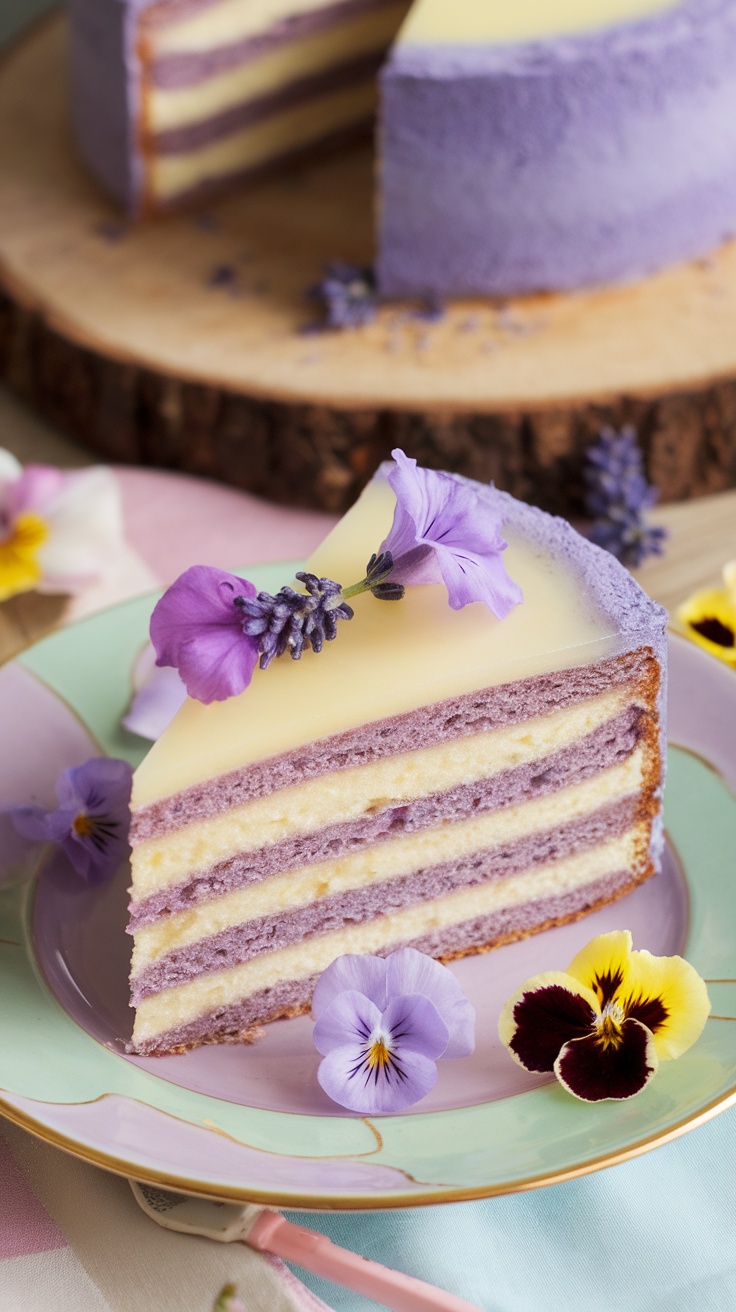
This Lavender Lemonade Cake is a refreshing dessert that combines the floral notes of lavender with the bright zing of lemon. The cake is moist, light, and perfect for any occasion, bringing a unique twist to traditional lemon cake. It’s simple to whip up, making it a great choice for both novice bakers and seasoned pros.
Each slice reveals beautiful layers of lavender-infused cake and creamy lemon frosting, creating a delightful balance of flavors. It’s a great way to impress guests at a summer gathering or enjoy with a cup of tea in the afternoon!
Ingredients
- 2 cups all-purpose flour
- 1 ½ cups granulated sugar
- ½ cup unsalted butter, softened
- 1 cup milk
- 3 large eggs
- 2 tablespoons culinary lavender
- 2 tablespoons lemon zest
- 1 tablespoon baking powder
- ½ teaspoon salt
Instructions
- Preheat the oven to 350°F (175°C). Grease and flour two 9-inch round cake pans.
- In a large bowl, cream together the softened butter and sugar until light and fluffy. Add the eggs one at a time, mixing well after each addition.
- In another bowl, combine the flour, baking powder, salt, and culinary lavender. Gradually add this dry mixture to the butter mixture, alternating with milk. Mix until just combined.
- Stir in the lemon zest. Divide the batter evenly between the prepared cake pans.
- Bake for 25-30 minutes, or until a toothpick inserted into the center comes out clean. Let cool in the pans for 10 minutes before transferring to wire racks to cool completely.
- Once cooled, frost with your favorite lemon frosting and garnish with additional lavender flowers if desired.
Fig and Honey Tart
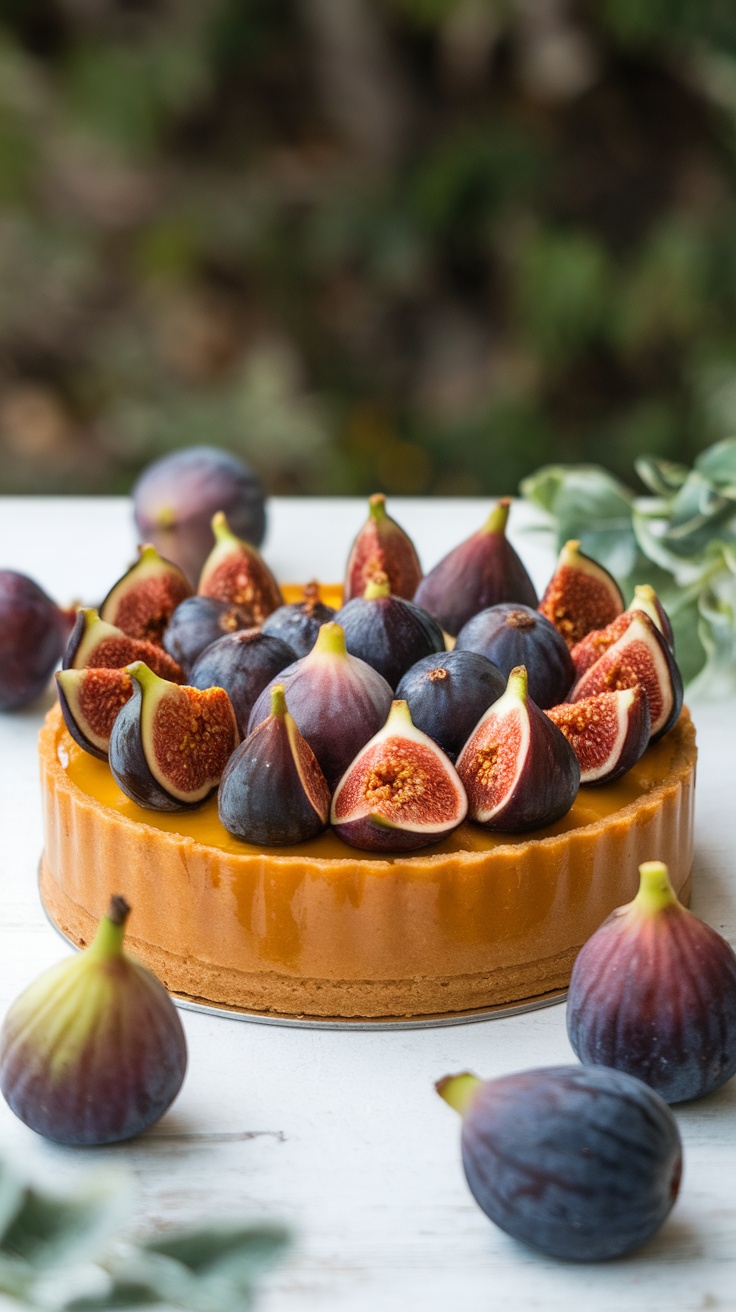
The Fig and Honey Tart is a delightful dessert that effortlessly blends the sweetness of honey with the unique flavor of fresh figs. This tart is not only visually stunning but also a treat for the taste buds, offering a harmonious combination of creamy filling and a buttery crust. It’s a simple recipe that brings a touch of elegance to any dinner table.
With its rich flavors and easy preparation, this tart is perfect for special occasions or a casual family dinner. The figs add a natural sweetness, making it a healthier dessert option. Whether you’re an experienced baker or a beginner, you’ll find this recipe straightforward and rewarding!
Ingredients
- 1 pre-made tart crust
- 2 cups fresh figs, halved
- 1/2 cup honey
- 1 cup heavy cream
- 1/2 cup mascarpone cheese
- 2 large eggs
- 1 teaspoon vanilla extract
- 1/4 teaspoon salt
Instructions
- Preheat the oven to 350°F (175°C).
- In a mixing bowl, whisk together the honey, heavy cream, mascarpone cheese, eggs, vanilla extract, and salt until smooth.
- Pour the mixture into the prepared tart crust.
- Arrange the fig halves on top, cut side up, in a decorative pattern.
- Bake for 30-35 minutes or until the filling is set and the top is slightly golden.
- Allow to cool before serving. Enjoy your delicious Fig and Honey Tart!
Peach Melba with Vanilla Ice Cream
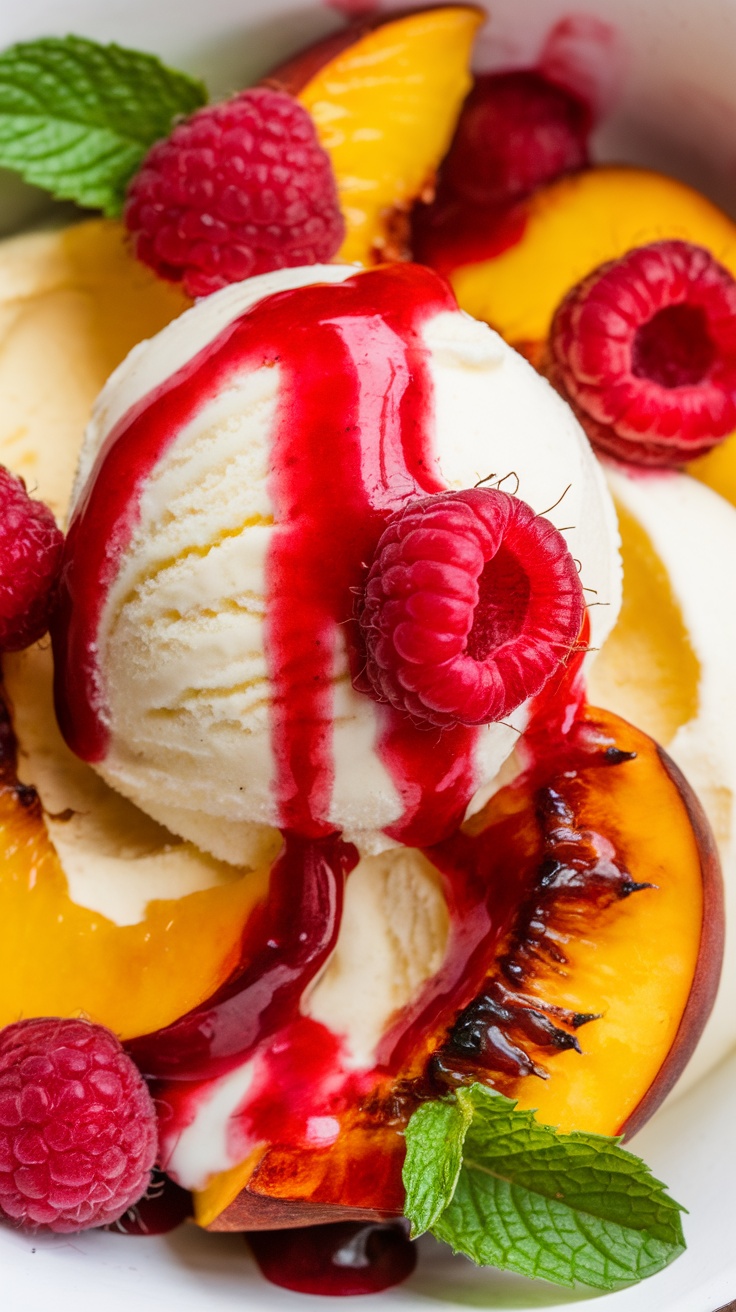
Peach Melba is a simple yet delightful dessert that combines the sweetness of ripe peaches with the creamy goodness of vanilla ice cream. This dish is not only a feast for the eyes but also a treat for your taste buds, as the juicy peaches pair beautifully with the smooth ice cream and a drizzle of raspberry sauce.
Making Peach Melba is a breeze, making it a perfect choice for a summer dinner party or a cozy night in. It’s a light and refreshing dessert that will leave everyone asking for seconds!
Ingredients
- 4 ripe peaches
- 2 cups vanilla ice cream
- 1 cup fresh raspberries
- 1/4 cup sugar
- 1 tablespoon lemon juice
- Fresh mint leaves for garnish
Instructions
- Prepare the Peaches: Bring a pot of water to a boil. Score the bottom of each peach with a small
Korean Sweet Rice Cake (Tteok)
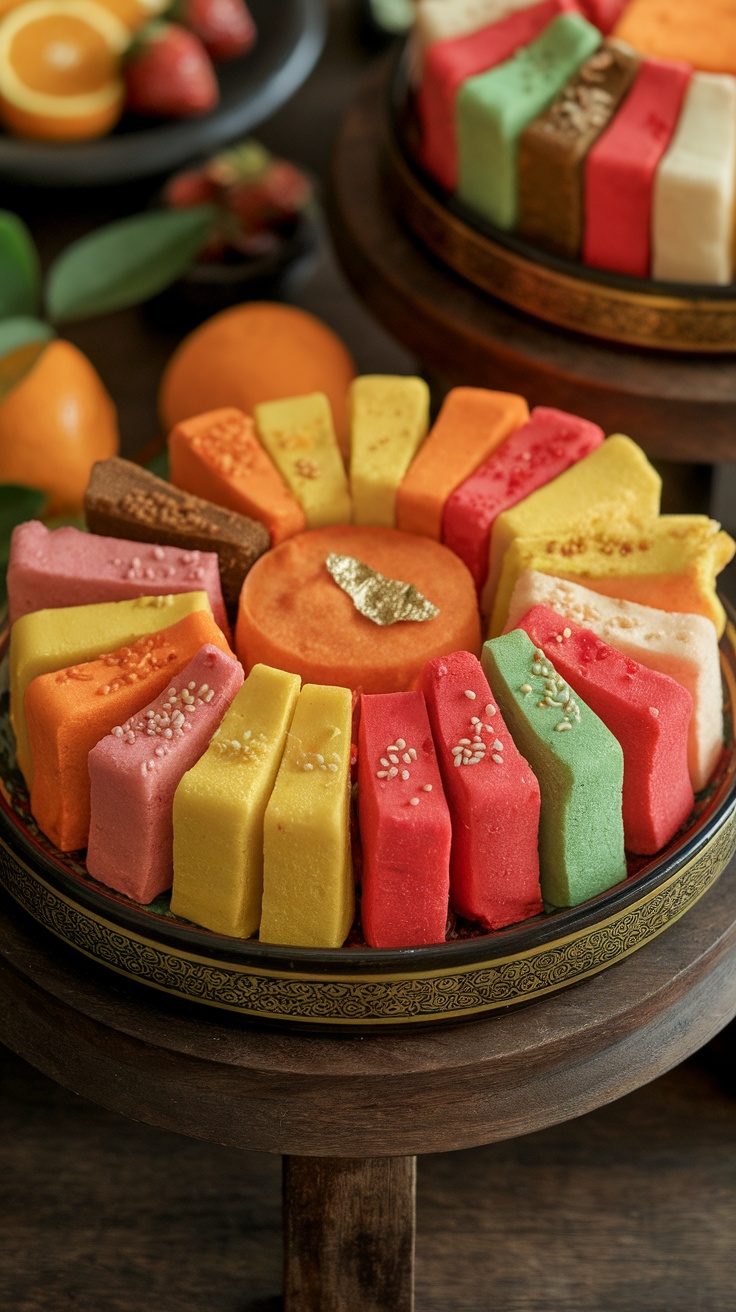
Korean Sweet Rice Cake, known as Tteok, is a delightful treat that’s chewy, slightly sweet, and often colorful. This dessert is made from glutinous rice flour and can be filled with various ingredients like red bean paste or fresh fruit. Tteok is not only delicious but also visually appealing, making it perfect for celebrations.
Making Tteok may seem challenging, but it’s actually quite simple. With just a few ingredients and some patience, you can create this lovely dessert at home. Enjoy it warm or at room temperature, and watch it impress everyone at your dinner table!
Ingredients
- 2 cups sweet rice flour (glutinous rice flour)
- 1/2 cup sugar
- 1 cup water
- 1/4 teaspoon salt
- 1 cup red bean paste or fresh fruit for filling
- Food coloring (optional)
- Sesame seeds for garnish
Instructions
- Prepare the Batter: In a bowl, mix sweet rice flour, sugar, salt, and water until smooth. If desired, divide the mixture and add food coloring to create different colors.
- Steam the Mixture: Pour the batter into a greased steaming dish. Steam for about 20 minutes until it becomes firm and cooked through.
- Shape the Tteok: Once cooled slightly, take the Tteok out and knead it gently. Divide into smaller pieces and flatten each piece. Place a spoonful of red bean paste or fruit in the center and fold over to seal.
- Garnish and Serve: Roll each piece in sesame seeds if desired. Arrange on a plate and enjoy!
Blueberry Peach Galette
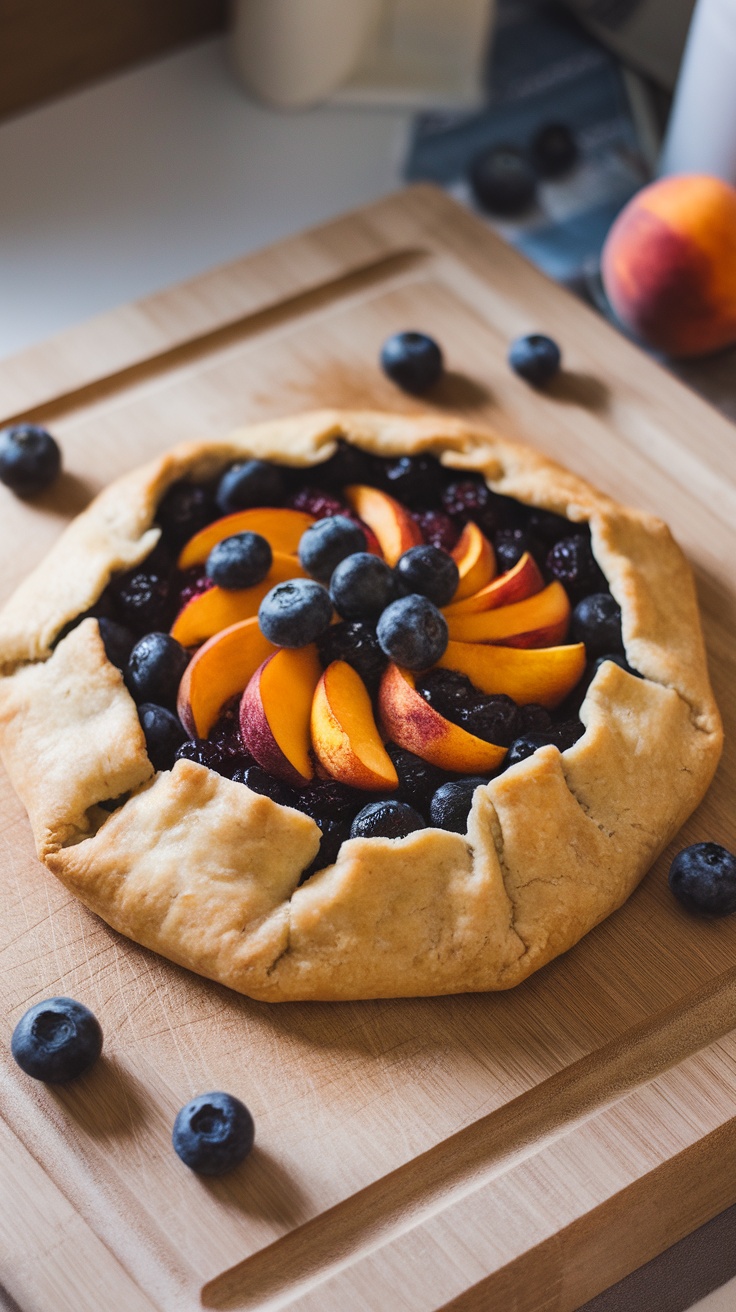
This Blueberry Peach Galette is a delightful blend of sweet and tangy flavors wrapped in a flaky, buttery crust. It’s simple to make, making it perfect for both beginner bakers and seasoned pros. The juicy peaches and plump blueberries create a refreshing burst in every bite, making it an ideal dessert for any occasion.
Serving this galette warm with a scoop of vanilla ice cream can take it to another level, but it’s equally delicious on its own. Plus, it’s a great way to showcase fresh summer fruits!
Whiskey Caramel Bread Pudding
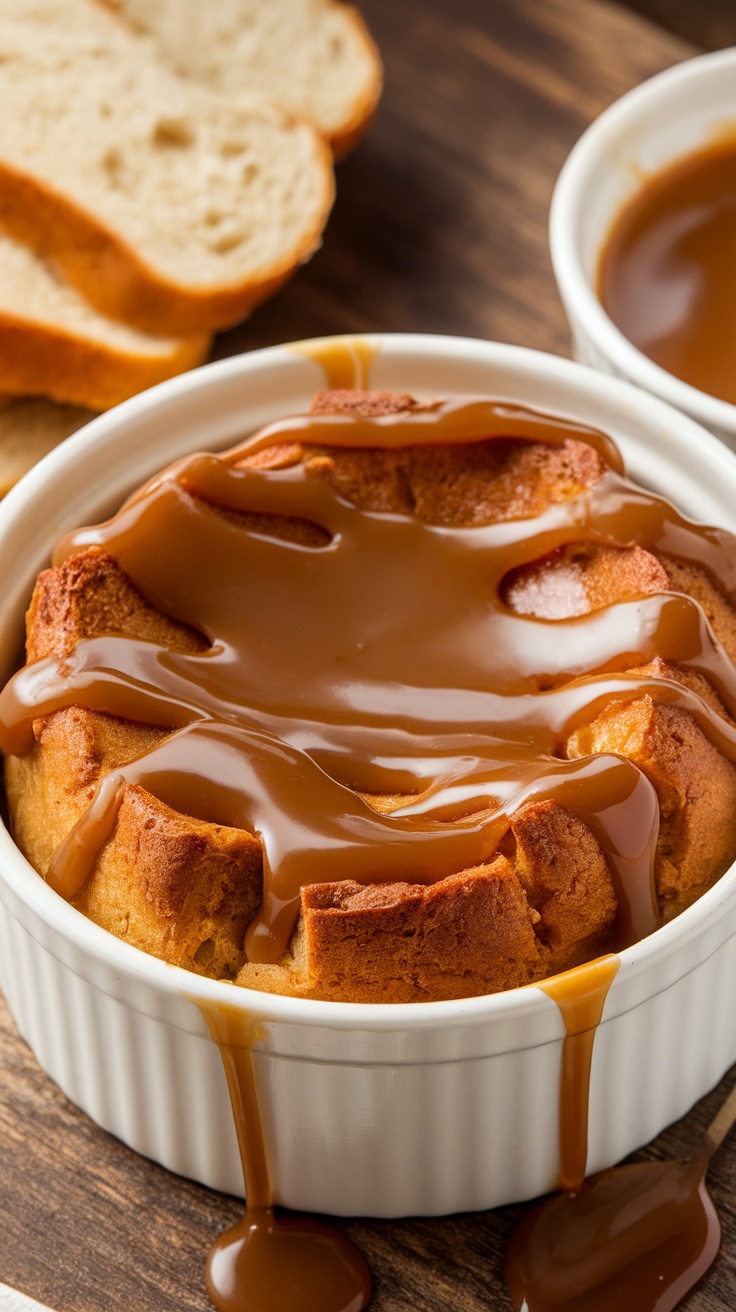
Whiskey Caramel Bread Pudding is a delightful twist on the classic dessert that brings together warm, rich flavors in every bite. This dish is comfort food at its finest, featuring tender bread soaked in a creamy mixture, then topped with a luscious whiskey-infused caramel sauce that adds depth and sweetness.
Making this recipe is simple, requiring just a few ingredients and minimal effort. It’s perfect for a cozy dinner gathering or a sweet ending to a family meal. Whether you’re serving it warm or at room temperature, this bread pudding is sure to impress anyone who tries it.
Ingredients
- 6 cups day-old bread, cubed
- 2 cups whole milk
- 1 cup heavy cream
- 4 large eggs
- 3/4 cup granulated sugar
- 1 teaspoon vanilla extract
- 1/2 teaspoon ground cinnamon
- 1/2 cup whiskey
- 1 cup caramel sauce (store-bought or homemade)
Instructions
- Preheat your oven to 350°F (175°C). Grease a baking dish with butter or non-stick spray.
- In a large bowl, whisk together the milk, cream, eggs, sugar, vanilla extract, cinnamon, and whiskey until well combined.
- Add the cubed bread to the mixture, gently folding until all pieces are soaked. Let it sit for about 15 minutes to absorb the liquid.
- Pour the bread mixture into the prepared baking dish and bake for 45-50 minutes, or until the top is golden and a knife inserted comes out clean.
- Allow it to cool slightly before drizzling with caramel sauce. Serve warm or at room temperature.
Cinnamon Roll Bread Pudding
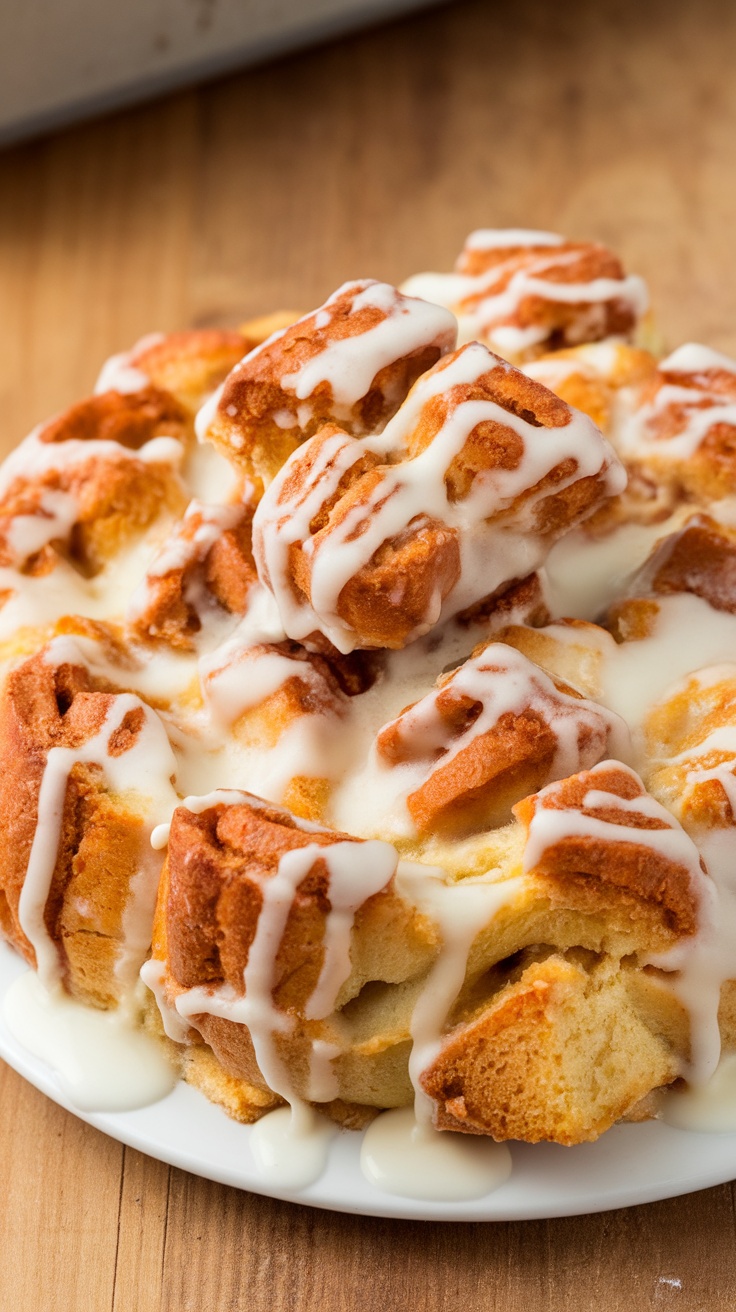
Cinnamon Roll Bread Pudding is a delightful twist on two beloved treats, combining the gooey goodness of cinnamon rolls with the comforting texture of bread pudding. This dessert is rich, warm, and bursting with flavor, making it a perfect ending to any meal. The cinnamon and vanilla blend beautifully, creating a sweet aroma that fills your kitchen as it bakes.
What makes this recipe so great is its simplicity. With just a few ingredients and minimal prep time, you can whip up a dessert that feels fancy yet is incredibly easy to make. It’s perfect for using up leftover cinnamon rolls or for indulging in a sweet craving.
Ingredients
- 4 cups cinnamon rolls, cut into cubes
- 2 cups milk
- 4 large eggs
- 1/2 cup granulated sugar
- 1 tablespoon vanilla extract
- 1 teaspoon ground cinnamon
- 1/2 cup raisins or nuts (optional)
- 1/2 cup cream cheese, softened
- 1/2 cup powdered sugar
- 2 tablespoons milk (for frosting)
Instructions
- Preheat your oven to 350°F (175°C). Grease a baking dish.
- In a large bowl, whisk together the milk, eggs, sugar, vanilla, and cinnamon until well combined.
- Add the cubed cinnamon rolls to the mixture and gently fold until they are well coated. If you’re using raisins or nuts, fold them in as well.
- Pour the mixture into the prepared baking dish and spread it evenly.
- Bake for 30-35 minutes, or until the pudding is set and golden brown on top.
- While the pudding is baking, prepare the frosting by mixing the softened cream cheese, powdered sugar, and milk until smooth.
- Once baked, let it cool slightly before drizzling with the cream cheese frosting. Serve warm and enjoy!
Chocolate Almond Biscotti
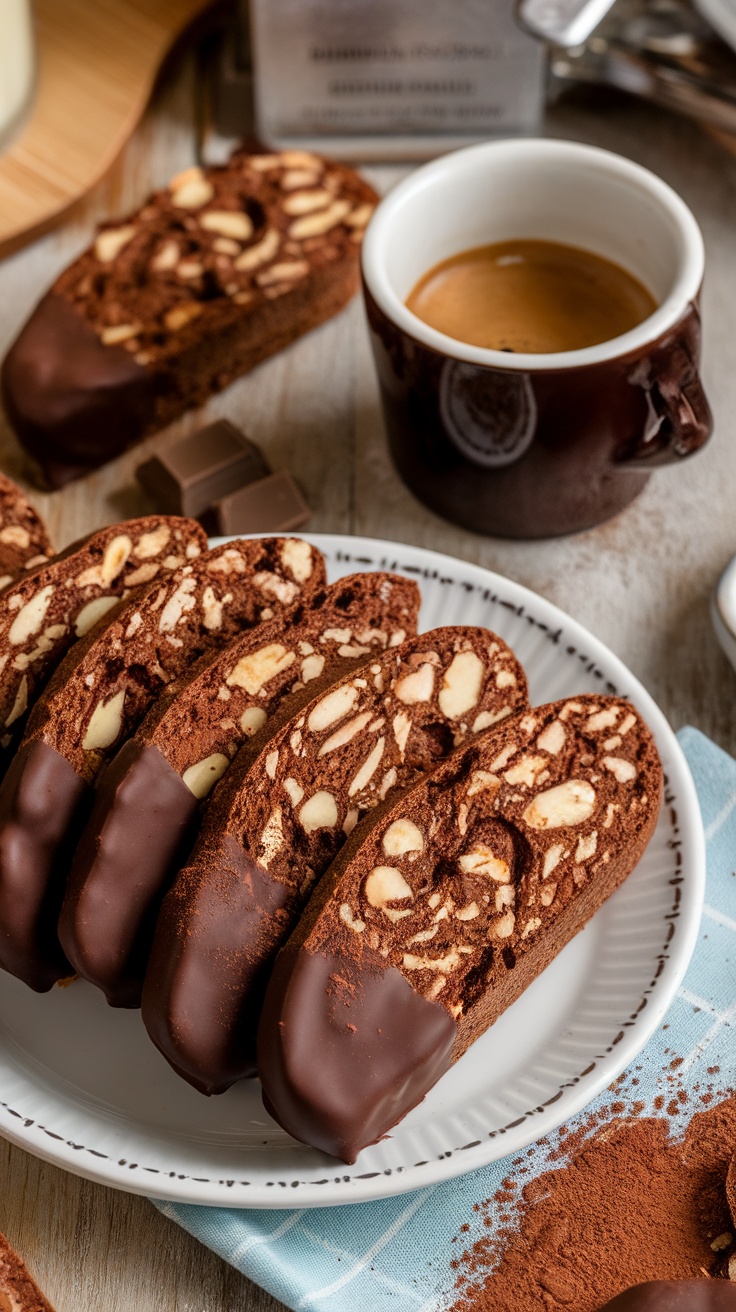
Chocolate almond biscotti are a delightful treat that perfectly blend the rich flavors of chocolate with the nutty crunch of almonds. These twice-baked Italian cookies are crunchy on the outside and slightly tender on the inside, making them ideal for dipping in coffee or tea. They’re simple to make, requiring just a few ingredients and basic baking skills.
The distinct taste of chocolate coupled with the sweetness of almonds creates a delicious combination that is sure to please any dessert lover. Whether you’re enjoying them as an afternoon snack or serving them at a gathering, these biscotti are a crowd-pleaser that adds a touch of elegance to your dessert table.
Ingredients
- 2 cups all-purpose flour
- 1 cup granulated sugar
- 1/2 cup unsweetened cocoa powder
- 1 teaspoon baking powder
- 1/4 teaspoon salt
- 3 large eggs
- 1 teaspoon vanilla extract
- 1 cup chopped almonds
- 4 ounces dark chocolate, melted (for dipping)
Instructions
- Preheat the oven to 350°F (175°C) and line a baking sheet with parchment paper.
- In a mixing bowl, combine flour, sugar, cocoa powder, baking powder, and salt.
- In another bowl, whisk together eggs and vanilla extract. Gradually add the wet ingredients to the dry ingredients, mixing until a dough forms.
- Fold in the chopped almonds until evenly distributed.
- Divide the dough in half and shape each half into a log about 12 inches long. Place the logs on the prepared baking sheet, spaced apart.
- Bake for about 25-30 minutes, or until the logs are firm. Remove from the oven and let cool for 10 minutes.
- Cut the logs diagonally into 1/2-inch thick slices and place them cut-side down on the baking sheet.
- Bake for an additional 10-15 minutes until the biscotti are crisp. Allow them to cool completely.
- Once cooled, dip the ends of the biscotti in melted dark chocolate and let set on parchment paper.